Sunday, August 31, 2008

BBD13: 100% Whole Grain Breads


My next-door neighbor has the burden of receiving many of my baked goods. It’s a burden that she apparently doesn’t mind. Actually, we’ve evolved into a comfortable, reciprocal relationship, sharing ingredients and meals. Recently, she and her 10 year old son decided to bake some muffins, using a recipe that was included in a novel she had just finished reading. They brought some over and asked for feedback, so, after tasting them, we talked about what we liked and didn’t like about them. My neighbor thought the orange and coconut was too overpowering, and while I thought the flavors were prominent, they were fine.


It turns out, though, that these muffins fulfilled a basic requirement for one of my monthly baking events, so I decided to bake some myself for August’s Bread Baking Day 13. I made a few slight adjustments to the recipe, and even though both sets of muffins were tasty, they each had their own distinct flavor. Because I used unsweetened coconut, the muffins weren’t overly sweet to me, which was a good thing. I also felt the flavors were well balanced. Yesterday I gave one to my neighbor and asked for her feedback on my rendition. When I find out what she thinks, I will add it to this post.


Meanwhile, here’s the recipe for some delicious muffins, just in time for BBD13, 100% Whole Grains, hosted this month by Jude of Apple Pie, Patis, and Pâté.


Dakota’s oatmeal, blueberry & orange muffins


1 cup plain rolled oats

1 cup whole wheat flour

t teaspoon each baking powder, baking soda, and salt

1 ½ cups flaked sweet coconut (I use unsweetened coconut)**

grated rind of one large orange (I used clementines from my tree for rind & juice)

1 egg

½ cup honey

3 tablespoons oil (canola or extra light olive oil, for example)

1 tablespoon vinegar (I used cider vinegar)

juice of 1 orange, with added water to make 1 cup of liquid

1 to 1 ¼ cups fresh or frozen blueberries


Preheat oven to 350°F.


Line a muffin tin with paper cups.


Combine the dry ingredients in a large mixing bowl. Add the coconut and orange rind .


In a separate bowl, beat the egg, then incorporate the honey, oil, vinegar, juice, and water.


Add the wet ingredients to the dry ingredients and mix until just moistened. Fold in the blueberries.


Pour batter into the muffin cups. (Batter will be thin.)


Bake for 20 to 25 minutes, or until a toothpick comes out clean.


Remove muffins from the pan and cool on a wire rack.


Makes 12 muffins.


You can find the recipe in The Friday Night Knitting Club, by Kate Jacobs.


Thanks, also, to Zorra (1x umrühren bitte aka kochtopf) for creating one of my favorite events.


**I don't particularly care for heavily sweetened coconut (in candy? never), but I do like fresh coconut and unsweetened coconut. That's why I keep a supply in the freezer and will use it in place of the ultra sweet stuff.


Let's Play Pat a Shoe

It’s the last day of August and it can only mean one thing – the end of summer? No, no, the Daring Baker’s post day. The challenge this month, created by Meeta and Tony, was to make éclairs, using the ever-versatile pâte à choux. The directions for the pastry dough, the luscious cream filling, and the glaze topping came from Pierre Hermé, the famous Parisian patissier. We were allowed some choice with the filling and glaze – one had to be chocolate, the other was our choice. For this challenge, I chose to make the filling chocolate, and then I experimented with a white glaze topping.


Because I’ve been making pâte à choux for many years, and because I’m a very analytical person, I decided to play with the instructions a little bit. Isn’t that the very core of a Daring Baker? I made the dough as per the instructions and piped it out and chilled it for about 30 minutes before baking. The baking part was where I diverged a bit. There’s a tendency for the shells to be underbaked, especially on the inside, causing collapse and gooey centers. It’s a hit or miss thing as far as I’m concerned, so I decided to consult an expert, Cookwise, by Shirley Corriher. According to Shirley’s instructions, you heat the oven first to 300°F; then, when you put in the éclairs, you immediately raise the temperature to 450°F (I went to 425°F). Once the éclairs have turned golden brown, you drop the temperature back down to 300°F and continue baking for another 10 to 15 minutes. I’m sold on this technique. My éclairs rose beautifully, turned a nice golden brown, didn’t collapse, and had perfect centers.


The chocolate cream filling turned out perfectly as well. I wasn’t particularly satisfied with the white glaze, however. It was awfully runny, so I will keep searching for a better recipe. I love the traditional chocolate tops, but this time I wanted a contrast between the center and the top.


When you have a spare week or two, check out the efforts of the other Daring Bakers. You won’t be disappointed!

Saturday, August 30, 2008

Jalapeño What?


Like a glutton for punishment, once again, I attempted baking cupcakes for the August Cupcake Hero event. And a challenge it was – jalapeño cupcakes. Oh my.

After my successful red, white, and blue cupcakes for July, I returned to the basic cupcake recipe from the Small-Batch Baking cookbook. I had some jalapeño-lime jelly in the pantry,

so I filled the cupcakes with that, then made a chocolate ganache-type frosting for the tops. Now, that chocolate frosting may look innocent, but it packs an extra kick because of the addition of some chipotle adobo sauce. So, the end result is my entry for the Cupcake Hero Jalapeño Cupcake. Eat one, if you dare!


Credits to Laurie for creating this event, and to Rachel and Teri, the hostesses (aka perpetrators) for this month’s challenge.

MKMW: Merrye Olde England

I want to live in England.


I can’t get my fill of it.


I’ve traveled over there quite a few times, and my favorite thing to do is drive around the countryside, stopping in towns and villages and at unexpected sites along the way.


I’ve hiked in the countryside, fending off flocks of curious sheep, and from town to town in the pouring rain. I’ve stood in awe looking at the great cathedrals in Winchester and Exeter, and walked around the huge monoliths at Stonehenge. I’ve seen A Midsummer Night’s Dream in Stratford-upon-Avon, visited Jane Austen’s home, and explored Warwick Castle and Roman ruins.


My last visit was three years ago, when I went to visit my most important client in Oxford,


(Blenheim Castle, near Oxford)


a trade show in London,


historic sites in Bath,


some friends near Bournemouth, and anyplace I could stop in between. It’s time to return.


But thanks to Megan, of My Baking Adventures, I could revisit my experiences in a dish of food. This week’s MKMW was England, and I chose one of my favorite recipes, Welsh Rarebit (or Welsh Rabbit) served over sliced tomatoes and toast. I had it for lunch today and used a lovely pale ale for the liquid. You can substitute milk or cream, if you wish, for the beer.


There are several ways to prepare this, but basically, you melt about one tablespoon of butter in a saucepan, add 1 ½ to 2 cups of grated sharp cheddar cheese and stir constantly over low heat to melt the cheese. Then you had about 1/3 to ½ cup of beer or milk, ¼ teaspoon dry mustard, dash of cayenne, ¼ salt, and ½ teaspoon Worcestershire sauce. Add one well beaten egg, and stir until smooth and thickened. Serve over toast or crackers. You can play with the amount to suit your taste.


A big thanks to Susan for a fun event, and to Megan for a great choice.

Friday, August 29, 2008

WCC 31 -- Get Your Grill On!

On the California coast, grilling season is really all year round. When I moved out here ten years ago, my outdoor grill was too worn out to make the journey, and I’ve never replaced it, sad to say. I do own a grill pan and a small electric portable grill, but they don’t really take the place of an old-fashioned charcoal briquette outdoor grill. I will have to remedy this situation soon, I think, because there are so many delicious recipes now and it is a relatively fuss-free way to cook.


This month, the Weekend Cookbook Challenge (#31) challenged us to grill. It took me this long to figure out what to do and how to do it, but I feel this recipe is a winner. It’s why I’ll start looking for a replacement grill. A real outdoorsy one.


I was browsing through my stack of recent Food & Wine magazines, not really looking for anything in particular, when my eye caught this title: Grilled Mini Meat Loaves. Grilled? Really? Yep, and they sounded delicious. I had all the ingredients, and I could halve the recipe, so I dug out the portable electric grill and gave them a try.

I had some small fresh mozzarella balls from Trader Joe’s, and they made a nice gooey surprise in the center.


Thanks to Sara of i like to cook for suggesting this theme. It was a challenge to find the right recipe, but I succeeded, and will definitely make these meatloaves again.

Thursday, August 28, 2008

SHF #46: Chocolate Meringue Cookies

In 1965 I received a cookbook for Christmas. It was the Joy of Cooking, 1964 edition. I’ve used it as a reference and as a starting point for many recipes, and, over the years, several specific recipes have become favorites.


When I have only a couple of leftover egg whites, I know exactly which recipe I’ll use them in: Chocolate Cracker Kisses. I don’t waste the egg whites, and I get to use a secret ingredient, as you shall see.


The theme for this month’s Sugar High Friday was late in coming, so, I figured I would miss out since I had to take a short trip out of town. But, I was pleasantly surprised to find that the deadline had been extended, so I would have a chance to share this favorite meringue cookie.


Chocolate Cracker Kisses


2/3 cup semisweet chocolate chips, or 1 ounce unsweetened chocolate plus ¼ cup sugar

2 egg whites

¼ teaspoon vanilla

¼ teaspoon cream of tartar

2/3 cup sugar

3 tablespoons crushed, salted soda crackers (saltines)


Preheat the oven to 350°F.


Melt the chocolate over hot water ( or over direct heat if you are watchful). Cool for about 5 minutes.


Beat the egg whites until foamy, then add the cream of tartar. Continue beating until nearly stiff, then add the vanilla and the sugar (gradually) until the mixture is very stiff. Gently fold in the crushed crackers and the cooled melted chocolate. Drop the meringue dough, a teaspoonful at a time, onto a well-greased or parchment-lined cookie sheet. Bake about 10 to 12 minutes. The cookies will have a glazed cap on top. Remove from oven and cool on a rack. Store in a tightly closed container.


This should make about 60 1-inch kisses, unless you spoon out larger amounts like I did. ; ) I only got 30, but they were fairly large.


Thanks to the hostess for this month’s SHF, Melly of One Messy Kitchen, and to Jennifer, the Domestic Goddess, who created this event. I’m guessing the entries will all be delicious.

BB: Butterflied Chicken


Our third Barefoot Bloggers event for August was marinated and grilled Butterflied Chicken, a delicious choice from Stefany of Proceed With Caution. It used to be that the only way to get a boneless piece of chicken was to bone it yourself, so, because my children had an aversion to food with bones, I got very proficient at the task. Nowadays, I keep a frozen supply of boneless chicken breasts on hand for quick meals, so, while I have experience boning an entire chicken, in the interest of time, I chose one of my frozen pieces for this recipe. Using rosemary and lemons that were freshly harvested from the garden, I prepared the marinade and let the chicken soak up all the flavor for an hour or so, then grilled it. Because I make a lot of chicken dishes, this one was a delicious change and simple to prepare. I sautéed fresh vegetables for a side dish, and, along with the mashed potatoes, really enjoyed the entire meal.


I’m looking forward to September’s entrées now. Check the Barefoot Bloggers site for all the other variations on Butterflied Chicken.

Sunday, August 24, 2008

No TWD this week

I'm heading out of town this morning -- off to spend a few nights in Las Vegas. Just can't get enough hot weather, I guess. ; ) So, I won't be posting about this week's Tuesday with Dorie dessert, although it sounds delicious. I should add that the Granola Grabbers we just made age particularly well. I finished the last ones today and I would say they taste much better than the ones that were really fresh.

When I return, it will probably take me several days to get caught up with everyone's baking!

Ciao for now.

Saturday, August 23, 2008

Think Spice, Think -- Cinnamon


I love spice. To me, spicy doesn’t always mean hot. It means a taste that explodes in your mouth or enhances the specific dish or sends you on arm-chair travels.


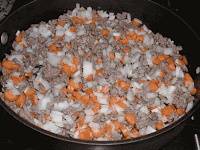
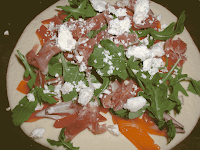
This month marks the first anniversary of Think Spice, Think…..., created by Sunita of Sunita’s World. To celebrate, Sunita asked participants to use their favorite spice. That would be difficult for me, since I really love spices of all kinds. One evening, though, while browsing through one of my recent issues of Cooking Light, I saw a recipe for Greek Lamb Pilaf, and one of the key ingredients was cinnamon. I had pretty much already decided to use cinnamon as my spice, so I was particularly delighted I could use it in a savory dish. I confess that I added a bit more cinnamon than the recipe called for, but it only contributed to the depth of flavors. I did substitute ground beef for the lamb, since it is easier to find here, and, following CL’s suggestion, I served the pilaf with green beans, sautéed pine nuts, and feta cheese.

Greek-style meat pilaf

(adapted from Cooking Light, June 2008)


2 1/2 cups chopped onion (about 1 large onion)
3/4 cup chopped carrot (about 1 carrot)
3 garlic cloves, minced
3/4 pound lean ground meat (beef or lamb)
1 cup uncooked long-grain rice

1/4 teaspoon ground cinnamon
1 (14-ounce) can fat-free, less-sodium chicken broth
1 cup chopped plum tomato (about 1 tomato)
1/4 cup chopped fresh flat-leaf parsley, divided

2 tablespoons chopped fresh mint
3 tablespoons fresh lemon juice

3/4 teaspoon salt


Heat a large nonstick skillet over medium-high heat.


Add first 4 ingredients to pan; cook 5 minutes, stirring to crumble meat. Stir in rice and cinnamon; sauté 2 minutes.


Stir in chicken broth; bring to a boil.


Cover, reduce heat, and simmer 20 minutes or until liquid is absorbed. Remove from heat; stir in chopped tomato, 3 tablespoons parsley, mint, lemon juice, and salt. Cover and let stand 5 minutes. Sprinkle with remaining 1 tablespoon parsley

4 servings (serving size: 1 2/3 cups)


Green Beans with pine nuts and feta

Trim one pound of green beans. Cook in boiling water for about 3 minutes, or until just tender, but still crisp; drain. Heat 2 teaspoons olive oil in skillet, add 4 teaspoons pine nuts and sauté until lightly toasted. Add beans, season with salt and pepper, and toss to combine. Sprinkle with 4 teaspoons crumbled feta and serve.


I'm looking forward to seeing all the entries for this anniversary event, so check out the Think Spice site in early September.

My Kitchen, My World: Jamaica

This week for My Kitchen, My World, we traveled to Jamaica, courtesy of Laura (One Happy Hubbard). While I have been to several Caribbean countries, I have never been to Jamaica. It’s on my travel list, though. Several months ago, Tony Bourdain ( No Reservations), showcased different aspects of Jamaica, so if you have a chance to catch repeats, it’s worth watching.


My daughter and I love jerk seasoning. I guess that just yells Jamaica, doesn’t it? Too bad that she missed the Jamaican dinner, though, since I made it the day she flew back east.


I always keep a jar of this jerk seasoning on hand that I get at Cost Plus World Market.


Usually, I use it on pork chops, but this time I focused on chicken, marinating it for about one hour before sautéeing. I also soaked some dried red beans, cooked them, and then mixed them with some leftover rice for the side dish. It was a truly delicious combination.


While jerk-flavored dishes seem to be most popular, check the blogs at My Kitchen, My World for other possibilities. Thanks, too, to Susan for a great event.

Thursday, August 21, 2008

Quick Pizza Dough Recipe


As promised in the preceding post, here’s my recipe for pizza dough. I found it years ago, and even though I’ve tried different recipes, this is the version I always return to because it can be made at a moment’s notice. The original recipe calls for whole wheat flour, but typically I use all all-purpose flour because the rise is better. Maybe adding a smidge more yeast would help with the whole wheat. You could also throw in the wheat germ, too, to boost the AP flour. [ I seem to have an abundance of wheat germ at the moment ; ) ]


Pizza dough (with whole-wheat flour}

1 package active dry yeast

2/3 c. lukewarm water (105-115°F)

2 t. sugar

½ t. salt

1 T. olive oil

1 ½ c. all-purpose flour

1 c. whole wheat flour (I sometimes use all-purpose flour)

Dissolve yeast in warm water (with a pinch of sugar) in the processor bowl. Add sugar, salt, oil, and all the AP flour. Process with the metal blade for 15 seconds. Let rise for 30 minutes in the processor bowl. Add whole wheat (or AP) flour and process until a ball forms on the blades.

Remove dough and knead on floured surface for 1 minute. Roll out into a large circle or rectangle to the desired thickness, about 1/8 to ¼ “ thick. Pinch up a rim around the edge.

Spread with the prepared Pizza Sauce, shredded cheese, and desired toppings.

Bake in a preheated 400° F oven for 15 to 20 minutes, depending on thickness crust. Serve.


This is a very versatile recipe, so you can be creative with the dough and the toppings. And, by using the food processor, it doesn't get much easier.

Barefoot Bloggers Bonus #2


This month’s Bonus Recipe was selected by Rebecca, of Ezra Poundcake. It seems to be a month for grilling, and Rebecca’s choice was no exception: Grilled California Pizzas. We love pizza in this house, so I make it frequently. I’ve never grilled one, though, and sadly, this one didn’t get grilled either because I don’t have a grill. My old one was too dilapidated to make the move several years ago, and it was never replaced, so I was forced to bake the pizza in the oven. The other major change I made was using my own pizza dough recipe. It is nearly identical, so I felt that it made little difference, and it is even quicker. I will post the recipe separately for those who are interested.


I divided the dough into quarters to make 4 small pizzas.


I goofed on the first two and forgot to add the arugula, but in a way, those turned out better. The arugula came out somewhat bitter after baking, so, although it adds color, I would probably use spinach next time and save the arugula for a salad. Oh, and I used feta instead of goat cheese. While my daughter loves goat cheese, I abhor it. I’ve tried and tried to like it, but to no avail. So, feta it was.


The step-by-step process follows. We thought the pizza was colorful and delicious. Since I’m not a huge fan of pizza sauce, I thought these were great!


Monday, August 18, 2008

TWD: Granola Grabbers

After looking at the ingredient list for this week’s TWD event, I came close to passing it by. Granola and wheat germ were the problems. Now, I like both of them, but they aren’t staples in my pantry and they are both rather costly. I could have made my own granola, I suppose, but with work projects and out-of-town guests, there just wasn’t the time. So, I made myself a deal. If I found usable granola at Trader Joe’s, I would spring for the wheat germ.


We are still a one-Trader Joe’s town, and when I made my weekly visit, I discovered that they had been making improvements (?) by shifting their inventory. Gone was the wide selection of granola. The only non-fruit-granola choice I had was Ginger, Almond, and Cashew Granola. So, that became the base of my cookies. On to the megamart for the wheat germ. $6.00 for a jar. $6.00? Must be made of gold. After removing the measly 1/3 cup, the jar went into cold storage to extend its shelf life.


I made a few other changes. No raisins in cookies in this house, so chocolate chips were substituted instead, although I could have gotten away with currants. If I make these again, I will use the currants. In place of sweetened coconut, I used unsweetened that I had on hand. There was agreement that the cookies had the right amount of sweetness, and I believe the unsweetened coconut contributed to that observation.


All the remaining ingredients were the same. Instruction-wise, I just folded the butter-sugar-flour mixture into the granola-nut mixture by hand since I didn’t want to crush anything. Using a small ice cream scoop, I dished the cookies onto the cookie sheets, did some minor shaping, and then baked them for about 11 minutes at 375F.


Taster ratings were as follows:


Daughter: good but not a cookie she would request; peanuts & coconut were overpowering

Grandma: good but wished there were raisins added as well

Moi: good but will use a different granola next time, since the ginger was too strong. Great for breakfast, though!


We all agreed that the cookies tasted better the next day, when the flavors had a chance to blend and mellow.


While this wasn’t a cookie I would have independently chosen to make, I’m glad I had the chance to try them out. Thanks to Michelle, of Bad Girl Baking, for choosing the Granola Grabbers. It will be interesting to see all the comments and variations from the other TWD Bakers this week.

My Kitchen, My World: Home Country


OK. I didn’t forget about the event this week, I’m just running behind. My daughter returns to college in 2 days, so we’ve been overwhelmed with last minute shopping, travel arrangements, and going-away events. Let’s see, there was breakfast out with the knitting group, several dinners out this week, grandparent visiting for the weekend, meaning lunches and dinners out. Whew! I did manage to fit in one home-made meal: meatloaf, mashed potatoes, and green beans. I figured that was pretty American, so that is my entry for this week’s My Kitchen, My World.


The main change I make with my meatloaf is that I bake it in a 9x9 pan, so it only takes about 45 minutes compared to the more traditional loaf pan-and-60 to 75 minutes approach. I’ve been using this recipe for decades, so it’s absolutely a requested family favorite.


Basic Meatloaf


1 1/2 pounds ground meat (beef, or a mixture of beef, pork, veal, etc.)

1/2 cup dry bread crumbs, or 1/2 cup wheat germ, or 3/4 cup oats (I used Italian seasoned breadcrumbs this time)

1 large egg

1 cup milk

1/4 cup chopped onion, or the equivalent amount in dried onions

1 tablespoon Worcestershire sauce

1 teaspoon salt

1/2 teaspoon dry mustard

1/4 teaspoon pepper

1/4 teaspoon sage

1/8 teaspoon garlic powder


Heat oven to 350 F. Mix all ingredients together. (I usually mix the dry ingredients first, then add the wet ingredients, then mix in the meat.) Spread in an ungreased 8x8x2" or 9x9x2" pan. Bake 40 to 50 minutes.


Variation: spread mashed potatoes over the meatloaf and sprinkle with grated cheddar cheese. Place back in oven until the cheese melts.