Wednesday, January 30, 2008

Lemon-Lime Scones

I'm lucky to live in lemon country. The state of California produces about 89% of the US lemon crop, and Ventura County, where I live, accounts for about 50% of that. It doesn't hurt, either, that I have 2 Meyer lemon trees growing in my backyard, along with a huge lime tree and one that has a good crop of clementines this year. I'm still waiting patiently for the blood orange to flower. Maybe some year. At least it's getting bigger each season.

When I saw the posting for this month's Homegrown Gourmet event, I decided to contribute a tasty morsel from my area.
Homegrown Gourmet was created by Bean's Bistro to represent one's home region, town, state, or area by featuring a local ingredient or a traditional dish or a creative twist on something from the region. This month's hostess is Gretchen Noelle at Canela y Comino, and her choice is quick breads. So, here is a delicate and delicious recipe for scones, using the local lemons and limes.


Lemon-Lime Scones

2 cups unbleached all purpose flour
2 tablespoons sugar
1 tablespoon baking powder
grated zest of one lemon and one lime

1/4 teaspoon salt
4 tablespoons cold unsalted butter, cut into pieces

2 large eggs
1/2 cup heavy cream
Extra cream or milk, for brushing

Decorating sugar or cinnamon sugar, for sprinkling

Preheat oven to 400 degrees (F) or 205 degrees (C). Line a baking sheet with parchment paper or a silicone sheet. In a medium bowl, combine the flour, sugar, baking powder, citrus zest, and salt. Cut in the butter until the mixture resembles coarse crumbs (pea-size). In a measuring cup, whisk together the eggs and the cream. Add to the dry mixture and stir lightly with a fork until the dough is formed.


Turn out onto a lightly floured surface and gently knead until the dough comes together. Divide the dough into 2 equal pieces and pat each one into a round about 1-inch thick. Cut each round into quarters.


Place the quarters 1-inch apart on the baking sheet; brush the tops with milk or cream, then sprinkle with the sugar of your choice. Bake in the oven until golden brown and crusty, about 15 to 20 minutes. Serve immediately.


The scones can be frozen.

The recipe can be halved.

Monday, January 28, 2008

Two Times the Fun -- the DB Lemon Meringue Pie

One of my earliest cooking memories is watching my grandmother make a lemon meringue pie. I recall standing on a chair next to the stove, watching her putting bits of butter into the lemon filling, and, of course, being the good child I was, asking Why?! Pies are my favorite dessert, and of all the flavors, lemon meringue is the best. So, when Jen from The Canadian Baker announced that the January challenge would be my favorite pie, I was excited. Plus, it didn't hurt that I have 2 Meyer lemon trees in the backyard, just begging to be harvested.

The biggest challenge for me was using different recipes for both the pie crust and the filling, since I've been baking this pie for many years.

Round 1:
The crust took the longest time because of all the waiting for chilling time.

While it wasn't difficult, it did shrink somewhat during baking, in spite of my being very careful not to stretch the dough (new dough, new feel) and using my pie weights. I wasn't thrilled with the texture or the thickness, so it's unlikely I will use it in the future.

The filling came next. Again, straightforward, although many other bakers in this challenge had
issues with the texture.

Finally, I prepared the meringue, being careful to beat it just long enough. Once assembled, the pie went back into the oven for browning. I watched the pie during this part, since I didn't want burnt meringue. The end result produced a delicious pie with no weeping, not even on my part, and it lasted several days in the refrigerator without deteriorating.


All in all, it was a successful challenge, but I just felt I could do better, so I challenged myself to tweak the recipe a bit to improve it.

Round 2:
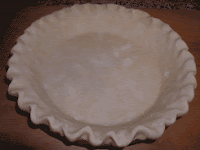
This time, I used my own pie crust recipe, adding sugar and using half butter and half vegetable shortening for taste and texture. Instead of one pie, I made 6 tarts, deciding on a free-form, sort of flowery design. While the oven was heating, the tart shells were in the freezer.


For the filling, I combined the egg yolks, cold water, sugar, and cornstarch in a pan, then cooked the mixture until thickened. It's a simple method and the egg yolks are cooked without being scrambled. Once thickened, the butter was added in bits, then the remaining ingredients.


I made no changes to the meringue, although I prepared it before I cooked the filling so it would be ready to go.

This time, I piped it onto the tarts, and the final results were even better than round 1, with no weeping, no leaking, no shrinking.


In the end, the two versions tasted exactly the same, although the second one was easier to make and more reliable. Thanks to Jen for a delicious challenge For the recipe, go to Jen's blog site. Check out the results from all the other bakers who were daring enough to try a lemon meringue pie.

PS: After 2 days, these little tarts are still holding their own -- no soggy crust, no oozing of any kind. Only one more left. (Ignore the bite marks)

Friday, January 25, 2008

Birds of a feather

puff up in stormy weather. . . . Here, in usually sunny southern California, as you may have heard, we've been beset with record-breaking rain, snow, hail, lightning, thunder, and tornadoes. That weather also affects all the poor birds, you know. So, that's my story and I'm sticking to it . . . .


BreadBakingDay #6

Having successfully met last month's challenge for BreadBakingDay #5, I have been eagerly awaiting the next event. This time, for BreadBakingDay #6, our hostess is Eva, from Sweet Sins, and the challenge is to create a shaped bread. Time for research, because I didn't want to make just any old shaped bread. So, I found a book in the library that had a wide variety of choices for breads of all kinds -- Celebration Breads: Recipes, Tales, and Traditions by Betsy Oppenneer (2003). My choice was definitely a challenge in the shape department -- Colomba di Pasqua, an Italian Easter bread that is shaped like a dove of peace. Or, in my case, like a very large, puffy storm-stressed bird. Well, just use your imagination.


This bread can be prepared in several ways -- by hand, by mixer, by food processor, and by bread machine. The book also gives diagrams showing how to do the shaping. To save space, I will describe my adaptation of the mixer method and the shaping method, as best I can.

Colomba di Pasqua (adapted from Celebration Breads)

Makes one very large loaf (15" by 18")

Dough:

1 1/4-ounce package active dry yeast
1/4 cup warm water (110 degrees (F))
1 1/2 cups milk
1/4 cup unsalted butter, softened
1/2 cup almond paste, crumbled
1 teaspoon vanilla extract
3 large eggs, lightly beaten
1 large egg yolk
1 tablespoon finely grated lemon zest

1/4 cup granulated sugar
1/2 teaspoon salt
4 to 5 cups unbleached all-purpose flour

Topping:

1 large egg white
1 cup thinly sliced almonds
1 tablespoon granulated sugar


In the mixer bowl, sprinkle the yeast onto the warm water to soften. Heat the milk to 110 degrees (F) and add it to the yeast along with the butter, almond paste, vanilla, eggs, egg yolk, lemon zest, sugar, salt, and 2 cups of the flour. Use the mixer paddle and beat the mixture on medium-low speed for 2 minutes. Gradually add the remaining flour, about 1/4 cup at a time until the dough begins to pull away from the side of the bowl. Change to the dough hook. Continue to add flour, 1 tablespoon at a time until the dough just begins to clean the bowl. Knead 4 to 5 minutes on medium-low speed.

Place the dough in an oiled bowl, coating the entire ball with oil. Cover and let rise for about 1 1/2 hours. (The almond paste may keep the dough from doubling in size.)


Turn the dough out onto a lightly oiled work surface and divide in half. (My suggestion would be to make one half somewhat larger than the other half.) Shape each half into a smooth ball, cover, and let rest for 5 minutes. Shape the smaller ball into a half oval, 12 inches long and 4 inches wide at the center. This will become the wings. Place it in the center of a parchment-lined baking sheet. Flatten the center slightly so that it won't be too thick when the rest of the dough is placed on top.


Shape the larger ball into a triangle with an 8 inch base and 16 inch sides. This will be the head and body. Center the triangle onto the flattened part of the wing piece. Fold the narrow top part over to the right to form the head. Pinch a bit of dough with your fingers to make a beak. Fold the bottom end towards the left, twisting it to form the tail. Then, using scissors, cut 2-inch slits along the bottom edge of the tail and wings. Fan them out to make feathers.

Cover and let rise for about 45 minutes.

About 10 minutes before baking, preheat the oven to 375 degrees.


While oven is heating, decorate the bird. Beat the egg white until frothy and lightly brush the dough. Arrange the sliced almonds in a slightly overlapping pattern on the tail and wings to simulate feathers. You can use a currant or raisin for the eye. Carefully brush the almonds with the remaining egg white and sprinkle with sugar.

Bake for 25 minutes or until the internal temperature reaches 190 degrees (F). Remove the bread from the oven and baking sheet, and place on a rack to cool.


May be frozen for up to 6 months.


Many thanks to Eva for hosting this month's event, and many thanks to Zorra at
1x umrühren bitte for creating it. If you have a chance to find this cookbook, you will enjoy reading the stories about different celebration breads from around the world.

My only problem now is figuring out which part of the dove to eat first.

Sunday, January 20, 2008

A Garlic Delight

Over the December holidays, I had the good fortune to cater three dinners. For two of them I prepared Chicken Marbella, the well-known recipe from the Silver Palate cookbook. It truly is a wonderful dish for large groups and parties, easy to prepare and very delicious. After making it twice, however, I decided to improve upon it to suit my own tastes, and because it uses a large quantity of garlic (January’s spice of the month), the timing was perfect.

Since I’m not a big fan of drumsticks, I eliminated them from my version. The biggest change, however, was using boneless chicken parts to avoid fighting the bones while eating. Specifically, I used the thighs because they have good flavor, stay moist, and are less expensive than boneless breasts. I also quartered the prunes, so they would be similar in size to the olives. The end result was fabulous and the leftovers were even better the next day. In the future, I will cooking the boneless version, both for my family and for others.

New & Improved (!) Chicken Marbella

(adapted from the Silver Palate cookbook)

6 to 12 boneless chicken thighs
1/2 a head of garlic, peeled and finely minced
2 tablespoons dried oregano
Kosher salt and freshly ground black pepper, to taste
1/4 cup red wine vinegar
1/4 cup olive oil
1/2 cup pitted prunes, quartered
1/4 cup pitted Spanish green olives
1/4 cup capers, with a bit of juice
3 bay leaves
1/2 cup brown sugar
1/2 cup white wine
2 tablespoons Italian parsley, finely chopped, for garnish

In a large bowl, combine the chicken thighs, garlic, oregano, salt & pepper to taste, vinegar, olive oil, prunes, olives, capers with juice, and bay leaves. Cover and let marinate, refrigerated, for 24 to 48 hours.


Preheat oven to 350 degrees.

Arrange chicken in a single layer in one or two large, shallow baking dishes and spoon marinade over evenly. Sprinkle the chicken with the brown sugar, the pour the white wine around them.


Bake for 45 minutes, basting frequently with the pan juices. Check for doneness (155 to 160 degrees in thickest part of thigh; there will be a small amount of carry-over cooking).


Transfer to serving dish; sprinkle with parsley. Pass remaining pan juices as sauce.

This can be served hot, room temperature, or cold (for picnics). Leftovers are even more tasty the next day!


For more delicious garlic recipes, go to Sunita's World. Thanks to Sunita for choosing such a versatile and popular spice.


Saturday, January 19, 2008

Veggin' Out challenge

This month's Weekend Cookbook Challenge, Veggin' Out, got me thinking about recipes I hadn't prepared in years, so I went to the cookbook shelf and pulled out The Vegetarian Epicure, Book Two, by Anna Thomas. I'd be too embarrassed to admit how much time has passed since I opened this cookbook, but one of my favorite recipes from it is Spinach Enchiladas Suizas.

Spinach Enchiladas Suizas

Serves 5

1.5 pounds trimmed spinach
3 tablespoons olive oil
1 tablespoon butter
1/2 large onion, chopped
2 cloves garlic, minced
salt to taste
3/4 pound Swiss cheese, grated
10 fresh corn tortillas
vegetable oil

Sauce:
1 tablespoon butter
1 tablespoon flour
1 cup milk, heated
1 cup sour cream, at room temperature
1/2 cup diced green chiles

optional garnish
sour cream and hot sauce

Wash the spinach leaves, drain them, and chop them. Heat the olive oil and butter in a large skillet; saute the onions and garlic in it until they are golden. Add the spinach and toss it in the hot oil until all of it is wilted. Salt it to your taste and continue cooking it over medium heat, stirring often, until all the liquid is gone.


Coarsely grate the Swiss cheese. Take a tortilla, brush it very lightly with vegetable oil, and heat it quickly on both sides in a skillet until it is very soft and flexible. Spread a heaping tablespoon of grated cheese in a line down the center of it, then spread a heaping tablespoon of the spinach mixture over the cheese. Fold one end of the tortilla over the filling and roll it up. Continue in this manner until all of the tortillas and spinach are used up.


Lightly oil a large, shallow casserole and arrange the enchiladas in it in such a way that they won't unroll.


To make the sauce, melt 1 tablespoon butter in a pot and stir in the flour. Cook the roux over low heat, stirring constantly, until it is golden. Add the heated milk and stir with a whisk until it is slightly thickened. Add the sour cream, diced chiles, and the remaining cheese and cook the sauce over low heat until all the cheese is melted and the sauce is quite smooth. Season it lightly with salt and pepper, then pour it over the enchiladas.


Cover the casserole and bake it in a preheated 350 degree oven for about 20-25 minutes. If you like, you can uncover the casserole after baking, and place it under the broiler to lightly brown the top.


Serve the enchiladas with extra sour cream and hot sauce, if desired.


Thanks to Sara at i like to cook for hosting a delicious challenge. (I don't think the photograph does the enchiladas justice, but they really do taste delicious!)

Wednesday, January 16, 2008

Chocolate Malted Whopper Drops

Over Thanksgiving weekend, while browsing at a local store, I discovered a bag of dark chocolate espresso malted milk balls. I immediately thought of a recipe I had seen in Dorie Greenspan's Baking From My Home to Yours (page 85), so I bought the bag and waited for an opportune moment to bake the cookies. Last week, after all the holiday baking had settled down, I went ahead and made the cookies. I'm glad I took photos right away, because the cookies did not disappoint and disappeared very quickly. I'm sure other types of malted milk balls would work just fine, but the added touch of dark chocolate and espresso was delicious. Next time I go to the Nut House (real name!), I will definitely buy another bag.

Tuesday, January 8, 2008

Wine, apples, and marshmallows

On my kitchen blackboard, I have a “wish to make” list. Marshmallows are in the number one spot. They are something that I have been wanting to make for a long time and I suppose I was waiting for the right time and for a good excuse.

This past weekend we drove up to Santa Maria to visit my mother and celebrate a belated Christmas with her. I try to make my gifts meaningful for the recipient, and during her visit here at Thanksgiving, I learned that my mother adores marshmallows and divinity, so I decided that my Christmas gift to her would be homemade marshmallows. (Divinity will have to wait – it’s rainy season here and humidity would not be my friend.)


Thursday evening, while my daughter was out with her knitting friends, I whipped out the marshmallows (oh, pun maybe intended?), using Alton Brown’s recipe. For my first try, I stayed with simple vanilla. My goodness, it was sticky! And, you have to work very quickly to scrape it from mixing bowl to prepared pan. My skills will probably improve with repeated attempts, I’m sure. On Friday morning I removed the marshmallow slab, cut it into pieces, and tossed the pieces with a powdered sugar/cornstarch mixture. They do taste much, much better than store-bought. I left a few for my neighbor, then boxed up the remainder to give to my mother. Well, the marshmallows survived the trip and were met with great approval and a request to make more. Next time I will try a second recipe I have and also play with different flavors.

We took one excursion on Saturday, in between the rain showers from three strong storms. Just south of San Luis Obispo, there is a lovely area called See Canyon. It is a popular area for hiking and biking, but also for apples and wine. During fall harvest season, you can find many varieties of delicious apples and apple cider. One of my quilt friends had brought back several varieties last October, which she shared during one of our meetings. And, recently, one of my culinary friends had gone there to check out the small winery in the same area, Kelsey See Canyon Vineyards. Along with more traditional wines, the winery also makes an apple merlot and an apple chardonnay, both quite tasty and both taking advantage of the local bounty. I came home with an apple merlot and a luscious zinfandel port. The apples, themselves, will have to wait until next fall, but I will definitely return to See Canyon during harvest season.


And bring more marshmallows.

Wednesday, January 2, 2008

2008 -- An Auspicious Start

Just minutes after midnight on January 1st, I opened my first bottle of sparkling wine (champagne). Now, I've drunk champagne and sparkling wine many times before, but this is the first time I've actually opened the bottle myself. Following the guidelines I learned in my wine class, I removed the foil, carefully removed the cage (7 turns or so), then, holding the bottle at an angle, proceeded to twist the bottle while holding onto the cork. I could feel the cork beginning to come out, and voilà! I had successfully and perfectly opened this bottle of sparkling wine -- just a bit of vapor drifted out of the opening and all the bubbles were going strong. This was an Italian sparkling wine, demi-sec, and a wonderful way to toast the coming year (along with some chocolate-mint cookies)!


For dinner, I made a curried black-eyed pea soup (also a tradition), which I served with home-baked bread. 2008 feels like it is going to be a wonderful year!


Curried Black-eyed Pea Soup

2-5 bacon slices, diced (depending on personal preference)
1 medium onion, finely chopped
2 celery ribs, sliced
1/4 teaspoon cayenne
1/2 teaspoon curry powder
1/2 teaspoon ground cumin
1/4 teaspoon dried hot red pepper flakes
3 15-oz cans black-eyed peas
2 cups chicken broth
3 tablespoons chopped fresh parsley leaves


In a large pot (3- to 5-quart) cook the bacon over moderate heat, stirring occasionally until golden. Add the onion and celery and cook, stirring occasionally, until the onion is softened. Add the spices during the last minute, and stir to heat them up and bring out the flavors. (If you like it spicier, just increase the amount to taste.) Add the peas with their liquid and about 2 cups of broth, and simmer, uncovered, for 20 minutes. Season with salt and pepper, if needed.


You can change the texture of the soup by blending all or some of it, depending on your preferences. I usually puree some of the soup using a stick blender to thicken it slightly.


Sprinkle on some chopped parsley before serving. Makes 4-6 servings.


Happy New Year!