Sunday, November 30, 2008

I Spy Mickey in the Rye


With all the baking these past few weeks -- and more to come -- I was glad that the deadline was extended for this month's chance to bake with the BBBs (aka Bread Baking Babes). The time-consuming part was creating the rye sourdough starter from scratch.

Gorel, of Grain Doe, was the hostess this time around, and she chose a Swedish specialty, Rosendals knäckebröd, a yeasted cracker that requires some of that aforementioned rye sourdough starter.

My starter began as a very stiff dough, and I began to wonder if it was progressing correctly. Thanks to comments from Natashya and Tanna, I didn't give up hope, and indeed, it turned into a nice tangy, soft dough. Luckily, the cracker part of the recipe doesn't take long, so last night I was able to play with and bake my crackers. Some have crushed anise seed on top, one has black sesame seeds, and another has Kosher salt. Each batch took a different amount of time to bake, which is most likely due to the varying thickness of the rolled-out dough.


I got to play with cookie cutters, too, which is always fun.


One little guy got nice and puffy.


And for my morning snack today, I melted some Havarti cheese on top. Yum. I can see more Havarti/cracker snacks in my future.


Thanks again to the Bread Baking Babes and Gorel for a delicious challenge. Recipes can be found on Gorel's blog.


Bread Baking Day 14: Colored Breads Two


Since I began the month of November featuring a colored bread, I decided to end the month with one more, mainly because I found the beet powder in the pantry. After I had use all the beet juice from my canned beets. Powder is certainly the easiest way to go.

Rather than bake another yeast bread, I chose to use a recipe for baking powder biscuits that I have been making for over 40 years. It's simple and delicious. It's one of the first breads I ever learned to make and I'm still using the recipe today. This time I just added some of the beet powder along with the flour.


These biscuits are good hot or cold and they disappear quickly.


Just in the nick of time, I'm sending these along to Bread Baking Day #14, hosted by Boaz of Grain Power. I'm looking forward to seeing everyone's colored breads.


Baking Powder Biscuits

1 cup unsifted flour
1 1/2 to 2 teaspoons baking powder
1/2 teaspoon salt
2 tablespoons and 2 teaspoons powdered milk
3 tablespoons shortening
1/3 cup water


Measure and sift the dry ingredients together. Cut in shortening until the mixture is the consistency of coarse corn meal. Add the water and stir gently until blended. Make the dough into a ball and knead gently, 8 to 10 times. Form into a ball and press it until it is about 1/2-inch thick. Cut into 9 pieces. Place on the baking sheet, 1/2-inch apart. Bake for 15 minutes at 425 degrees F. Cool on rack or eat them all up quickly, slathered with butter.


(Hey, this was from my high school Home Ec class. Writing wasn't very sophisticated back then!)

My Kitchen, My World: Thankfulness

My Kitchen, My World took a diversion this week and asked participants to write about things for which they are thankful.

My family, both past and present, has always been a bit of a maverick when it comes to Thanksgiving. My grandmother apparently never fixed a turkey. It was always chicken. My mother says that the only time they had turkey on Thanksgiving was when they were guests at someone else's feast.


Well, that carried on down, you see, for my mother rarely ever cooked a turkey. I think I remember the last time she did, when I was very young, and some disaster happened, so from then on there was no turkey unless, as before, we were somewhere else. As I was growing up, Thanksgiving dinners ranged from sukiyaki to spaghetti to chicken. One year it was just tuna sandwiches.


Needless to say, I inherited a bit of an 'attitude' when it came to Thanksgiving dinner. As an adult, I refused to go the traditional route, opting instead to use the traditional ingredients, but in nontraditional ways. It's still my take on Thanksgiving. This year I was invited out, but for the last two holidays, I have made Giada's Turkey and Cranberry Ravioli for dinner. It's so good, that I suspect it will become the traditional meal for future holidays.

Last year I added a green bean casserole. Since I try not to use processed foods, it took awhile to find a good one. The only change I've made on Alton's original recipe is to deep fry the onions, although there is still room to play in that area. I also use cremini mushrooms.

I usually make my pumpkin pie for Halloween, and my pecan pie for Thanksgiving along with a pumpkin-themed dessert that is not pie. I'm constantly on the lookout for interesting recipes that provide a twist on the usual.

There is one item, however, that I don't mess with particularly. Rolls. Quite a few years ago, I came across a fabulous recipe for hamburger buns on King Arthur's Baking Circle chat group. I can make this blindfolded, by heart, I make it so often. It's one of the recipes my older daughter requested when she started her own family, and I know she makes it frequently. While it's geared for the bread machine, you can make it manually, as I have done several times. But, really, with all the preparation required for holiday meals, it's nice to have a fail-proof recipe that you can work on with minimal attention.


In the spirit of holiday sharing, here is the wonderful roll recipe.


Moomie’s Buns


1 c water

2 tbsp butter

1 egg

3 1/4 c. flour

1/4 c. sugar

1 tsp salt

3 tsp instant yeast


Place all ingredients in your bread machine. Select manual dough cycle. Allow to run cycle.


Dump out onto lightly floured surface. Divide into 8 pieces. With each piece, slap into a bun shape. Usually 4 or 5 slaps will do it. Place on greased cookie sheets or your bun pans, cover; rise about 30 to 40 minutes.


Bake in preheated 375 degree oven for 12 to 15 minutes til golden. Cool on wire racks.

If you don't have a bread machine, you can simply mix dough by any method you prefer. Let it rise one hour before shaping into 8 large buns.

My version: when the dough is ready for shaping, I shape as I wish. For large groups or holiday gatherings, I divide the dough into 15 pieces, shape into balls, and place in a 9” by 13” greased baking pan. When the rolls have risen, I brush them with melted butter and sprinkle salt or other seasonings on top, then bake them. The result is a pan of pull-apart rolls that are always the hit of the meal. If I want left overs, I make the rolls a bit smaller (18 rolls) and cook the extra 3 by themselves to enjoy later.


So, in the spirit of the season, I'm thankful for a family that encouraged me to create new traditions while appreciating the old ones.

Saturday, November 29, 2008

Caramel Delights

Exactly ten days ago, I was at the dentist getting fitted for a crown for one tooth. As I left the office, unable to feel my face, both the dentist and his assistance called to me: “No caramels for three weeks!” Are they secret Daring Bakers? Are they clairvoyant? How did they know?

Although I’m still waiting to get the permanent crown, that did not deter me from making the caramels anyway, and, yes, even Tasting Them! I was careful. (Keep your fingers crossed.)

You might have guessed by now that the Daring Baker challenge for November focused on caramels – caramel cake, caramel frosting, and caramel candy. When making caramel anything, there are two essential qualities a baker needs: patience and lack of fear. It is not for the faint of heart.

The first task this month was to make a caramel syrup, which was a component in both the cake and the frosting. I’ve made caramel syrup several times before, so this was easy, only requiring patience and an eagle-eye to keep the sugar from turning to black carbon.

On to the cake. The recipe used a standard cake-making technique, mixing fat and sugars, then alternating dry and wet ingredients. I chose to make cupcakes this time. It was my turn to host my quilt group, so I wanted to spread the calories around to as many people as possible. The cakes had a nice texture and flavor, not too overwhelming.

Which is a good thing, because the frosting was the star. This was a super sweet and rich browned butter frosting. Oh my, it was so delicious! The frosting was everyone’s favorite part of the dessert! When I served the cupcakes, I drizzled some of the leftover caramel syrup over each one and sprinkled them with a pinch of Kosher salt. What a great combination! (I also have to admit that I kept drizzling that syrup over the leftover cupcakes each time I ate one. The syrup only became more flavorful the longer it sat, but then, it also decreased in volume at the same time. I believe someone finally licked out what was left, uh, namely, me.)

While my cupcakes weren’t particularly creative-looking, there are hundreds of Daring Bakers out in blogland who have made some stunning creations. Check them out when you have some free time; you’ll be inspired.

This morning (28th) I focused on the caramels, the final part of the challenge. I had found a supply of Lyle’s Golden Syrup at a small British import shop in our downtown area, so I was set to go.

The caramels were straight forward. Boil the sugar and syrup to a certain temperature, add butter, then hot cream, then boil again to another temperature. It takes awhile to reach each temperature, so I would just multitask in the general vicinity of the stove, and keep an eye on the thermometer. The most difficult part was waiting for them to cool so I could taste one (carefully).

They are really good, but there are a gazillion of the little guys, so I will probably be up all night wrapping them in wax paper.

I would also highly recommend using the nonstick foil. As you can see, even though I didn’t grease it, the caramels did not stick at all.


So, thanks go out to this month’s co-hosts for a delicious challenge:

Dolores of Chronicles in Culinary Curiosity (http://culinarycuriosity.blogspot.com/)

Alex of Blondie and Brownie (http://blondieandbrownie.blogspot.com/)

Jenny of Foray into Food (http://forayintofood.blogspot.com/)

Natalie of Gluten-a-Go-Go (http://glutenagogo.blogspot.com/)

And, of course, major credit goes to Shuna Fish Lydon (http://eggbeater.typepad.com/) for the luscious Caramel Cake with Caramelized Butter Frosting, published on Bay Area Bites (http://blogs.kqed.org/bayareabites/) and adapted from an original recipe by Flo Braker.

The Golden Vanilla Bean Caramels appeared in Pure Dessert by Alice Medrich (Artisan Press).


If you wish to challenge yourself by making some wonderful caramel desserts, check the hosts’ blogs for the various recipes.

Thursday, November 27, 2008

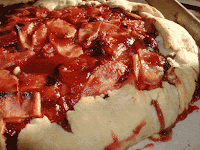
Wassail Christmas Pie


Would you believe me if I told you that this filling almost didn't make it to the pie? I came this close to eating it all out of the pan. Oh my goodness.


For this month's You Want Pie With That? event, Anne of Anne Strawberry chose the theme, Holiday Songs. Just match a pie to your favorite holiday song, that's all. Not any easy task for me, at any rate, because my taste in holiday songs is a bit eclectic. But, the other day, I had on one of my favorite Christmas CDs (Sing We Noel),


humming and singing away, when inspiration struck. Here I was, singing about Christmas Pie. Was there really such a thing? Inquiring minds . . . .

As is the case with many investigations, one follows the Rabbit Trail. My song is called The Gloucestershire Wassail Song, and the verse is as follows --

And here is to Dobbin and to his right eye,
Pray God send our master a good Christmas pie,
And a good Christmas pie that we may all see;

With our wassailing bowl we'll drink to thee.


What's in wassail, you ask?


All sorts of delicious goodies -- apples, cranberries, oranges, lemons, spices. Why, that just might make a decent pie.

And so it did.


As best as I can recall, the recipe went something like this:

2 pounds of apples, peeled and sliced (I used Braeburns)
1 cup or so of fresh cranberries (it was approximate)
1 ounce of butter
3 ounces of sugar


2 ounces of water
1 ounce of cornstarch

3.5 ounces of sugar
1/4 teaspoon salt
1 teaspoon cinnamon
1/4 teaspoon nutmeg

1/4 teaspoon cloves
2 teaspoons orange zest
2 teaspoons lemon zest
2 teaspoons lemon juice
.25 ounce of butter

Saute the apples and cranberries in the 1 ounce of butter until slightly softened. Add the 3 ounces of sugar while the fruit is cooking.


Mix the water and cornstarch together until smooth. Add to the hot fruit mixture and cook until the liquid is thick and clear. Remove from heat.

Add the remaining ingredients, stirring gently until the sugar is dissolved and the butter is melted.

Cool completely.


Fill either a pie shell or make a rustic/country-style pie, like a crostada. Dot with extra butter if desired. Bake at 425 degrees F (220 degrees C) until golden, about 30-40 minutes. Be sure and bake it on a parchment lined sheet pan so the juices don't spill into the oven.

Try to let cool before eating. (I dare you.)


So, this Wassail Christmas Pie is my entry for this month's You Want Pies With That? I bet there will be many other delicious pies showing up in the next few days!


And if you are interested, here are the verses to the Gloucestershire Wassail Song.

1. Wassail! wassail! all over the town,
Our toast it is white and our ale it is brown;
Our bowl it is made of the white maple tree;
With the wassailing bowl, we'll drink to thee.

2. Here's to our horse, and to his right ear,
God send our master a happy new year:
A happy new year as e'er he did see,
With my wassailing bowl I drink to thee.

3. So here is to Cherry and to his right cheek
Pray God send our master a good piece of beef
And a good piece of beef that may we all see
With the wassailing bowl, we'll drink to thee.

4. And here is to Dobbin and to his right eye,
Pray God send our master a good Christmas pie,
And a good Christmas pie that we may all see;
With our wassailing bowl we'll drink to thee.

5. So here is to Broad Mary and to her broad horn
May God send our master a good crop of corn
And a good crop of corn that may we all see
With the wassailing bowl, we'll drink to thee.

6. And here is to Fillpail and to her left ear
Pray God send our master a happy New Year
And a happy New Year as e'er he did see
With the wassailing bowl, we'll drink to thee.

7. Here's to our cow, and to her long tail,
God send our master us never may fail
Of a cup of good beer. I pray you draw near,
And our jolly wassail it's then you shall hear.

8. Come butler, come fill us a bowl of the best
Then we hope that your soul in heaven may rest
But if you do draw us a bowl of the small
Then down shall go butler, bowl and all.

9. Be here any maids? I suppose here be some;
Sure they will not let young men stand on the cold stone!
Sing hey O, maids! come trole back the pin,
And the fairest maid in the house let us all in.

10. Then here's to the maid in the lily white smock
Who tripped to the door and slipped back the lock
Who tripped to the door and pulled back the pin
For to let these jolly wassailers in.

TWD: Twofer Pie


I just finished washing the dishes. It took me three times as long as usual (40 minutes) to do them all, and I didn't even have Thanksgiving at my house! I hate to think . . . . My wonderful neighbor invited me over to share Thanksgiving with her and her family. Her 10 year old son made the pumpkin pie, his first ever. He didn't tackle a crust this first time, but that didn't matter because the filling was delicious. Hopefully, he'll keep cooking.

For me, it's been a two-pie 24 hours. What am I to do with 2 pies? Exercise a lot, I guess.

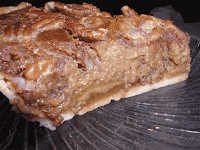
First, there is Dorie's Thanksgiving Twofer Pie, a combination pumpkin pie and pecan pie. I didn't have any real issues with this pie except for having to cook it an extra 25 minutes, and although it tastes fine (actually even better cold the next day), it won't replace my standards. I like my pumpkin pie DARK and SPICY. In fact, on this one I cheated just a teensy bit and threw in extra spice. Someday I will bake my standard pumpkin pie and share it. It makes your mouth tingle.


As for the pecan pie, I've already written about my favorite, and it is no contest. As good as this one is, I like my other two better, so I will stick with them. But I appreciate being given the opportunity to test-drive a new one, thanks to Vibi of
La casserole carrée.


(Warm slice)

Now, I wasn't disappointed, mind you, just underwhelmed. It is interesting to see how the other TWD bakers felt about it as well, so check out their blogs when you have a free hour or two.

(Chilled slice)


Pie # 2 is coming up soon.

Barefoot Bloggers: Mexican Chicken Soup


Soup is one of my favorite meals. For years I dreamed of opening a restaurant that specialized in just soups. Who knows? Maybe that will still happen. There's nothing better than homemade soup and fresh bread.

This month, it suddenly became my turn to select a recipe for the Barefoot Bloggers. I say suddenly, because I had calculated that January would be my month (only uber-analyticals would probably think that way), so I guess some of the early participants had dropped out. This also meant I had to think fast (also a problem for analyticals). I decided to look through my 'to try' list for Ina's recipes, and saw the one for Mexican Chicken Soup. At least for the Northern Hemisphere, this is a soup-time-of-year, and Thanksgiving notwithstanding, that became my choice. In fact, I had planned to make this soup for my personal Thanksgiving, but a last minute invitation put an end to that, so I made it for Thanksgiving Eve.


I did halve the recipe, used boneless chicken breasts and diced tomatoes, and substituted parsley for cilantro. I thought the soup was delicious, and will certainly become part of my soup rotation throughout the year. The seasonings were right on the mark, too. I usually increase the amount of cumin because I love that flavor, and I made sure the saltiness was where it should be. Tasting is essential here, and proper seasoning makes all the difference.


While I forgot the avocado (duh), I did make my own tortilla chips, so along with the garnishes of sour cream and grated cheddar cheese, it was a perfect meal.


I would also add that this soup easily converts to a vegetarian version. Instead of chicken and chicken broth, substitute vegetable broth and pinto beans (my favorite), or some combination of beans and corn, which make a complete protein. You won't even miss the chicken.


I've included the recipe this time because it was my choice, but you can also find it on the Food Network website. Other Barefoot Bloggers have shared their opinions about the soup, too, so please check out their sites as well.


Mexican Chicken Soup
Courtesy of Ina Garten
  • 4 split (2 whole) chicken breasts, bone in, skin on
  • Good olive oil
  • Kosher salt and freshly ground black pepper
  • 2 cups chopped onions (2 onions)
  • 1 cup chopped celery (2 stalks)
  • 2 cups chopped carrots (4 carrots)
  • 4 large cloves garlic, chopped
  • 2 1/2 quarts chicken stock, preferably homemade
  • 1 (28-ounce) can whole tomatoes in puree, crushed
  • 2 to 4 jalapeno peppers, seeded and minced
  • 1 teaspoon ground cumin
  • 1 teaspoon ground coriander seed
  • 1/4 to 1/2 cup chopped fresh cilantro leaves, optional
  • 6 (6-inch) fresh white corn tortillas
  • For serving: sliced avocado, sour cream, grated Cheddar cheese, and tortilla chips

Preheat the oven to 350 degrees F.

Place the chicken breasts skin side up on a sheet pan. Rub with olive oil, sprinkle with salt and pepper, and roast for 35 to 40 minutes, until done. When the chicken is cool enough to handle, discard the skin and bones, and shred the meat. Cover and set aside.

Meanwhile, heat 3 tablespoons of olive oil in a large pot or Dutch oven. Add the onions, celery, and carrots and cook over medium-low heat for 10 minutes, or until the onions start to brown. Add the garlic and cook for 30 seconds. Add the chicken stock, tomatoes with their puree, jalapenos, cumin, coriander, 1 tablespoon salt (depending on the saltiness of the chicken stock), 1 teaspoon pepper, and the cilantro, if using. Cut the tortillas in 1/2, then cut them crosswise into 1/2-inch strips and add to the soup. Bring the soup to a boil, then lower the heat and simmer for 25 minutes. Add the shredded chicken and season to taste. Serve the soup hot topped with sliced avocado, a dollop of sour cream, grated Cheddar cheese, and broken tortilla chips.

Sunday, November 23, 2008

Think Spice, Think -- Anise


One of my favorite spices has always been anise. While I usually make springerle cookies, this year I wanted to try a different recipe. I ran across a recipe for Rich Anise Cookies, that sounded delicious, so I gave them a try. What's really nice about them is that they are refrigerator cookies, so I can bake them up at a moment's notice, whenever I want a fresh, warm dessert. This is a good thing so I don't eat them all at once!

I'm sending this along to Manuela at Baking History, who is hosting this month's Think Spice event. Be sure and check out her blog for all the entries, and also take a look at Sunita's blog. Sunita started the event and there are always wonderful and spice-laden recipes at her site.


Rich Anise Cookies

2 1/2 cups sifted flour
1/2 teaspoon salt
1 cup butter
3 ounces of cream cheese, softened
1 cup sugar
1 egg yolk
1/2 teaspoon vanilla
2 teaspoons anise seeds, crushed

Sift together the flour and salt and set aside.

Cream together the butter, cream cheese, and sugar until light and fluffy. Add the egg yolk and vanilla and beat well.

Gradually stir in the dry ingredients, mixing well. Stir in the anise seeds.

Divide the dough in half. Shape each half into a roll, 2-inches in diameter. Wrap the rolls tightly in waxed paper and chill in the refrigerator for at least 2 hours or overnight.

Cut the rolls into 1/8-inch slices. Place the rounds about 2 inches apart on ungreased baking sheets.

Bake at 350 degrees F for 10-12 minutes, or until the edges start to brown. Remove from baking sheets and cool on racks. Makes about 6 dozen.

Saturday, November 22, 2008

My Kitchen, My World: Iran

Before I describe my experience with Persian cooking, let me tell you about two things I learned.

1. One person's difficult/hard recipe is another person's easy recipe.

2. Dehydrated herbs, in quantity, are to be avoided.


Now, on with the story.


When I learned that we were traveling to Iran this week, I contacted my neighbor, who is also my excess-baked-goods recipient. I knew that one of her friends came from the central Asia region, so I decided to find out which country it was, hopes high. Much to my pleasure, she told me that F was indeed from Iran and would be more than willing to share some recipes with me. So, F and I met at a local coffee shop and she showered me with 4 recipes, instructions, and some dried whole lemons.

She also referred me to a local shop that might have some of the less common ingredients. Her generosity was amazing.

After we parted, I went straight to the shop, and found the three ingredients in question. F had suggested that for one dish, using the dried herbs would be much quicker than washing and chopping all the fresh ones, so based on her recommendation, I bought this:


Combining the recipe on the can and F's recipe, I prepared Gormeh Sabzi. On one level, it was a delicious, lemony meal, but oh, those dehydrated herbs! They just never lost that grassy taste, even after soaking, sauteeing, and cooking. I will have to remake this dish using the fresh ingredients, for I am sure it will be ten times better that way. I really don't recommend using them if you ever make this. Also, I did substitute beef for lamb, which F does as well, since she doesn't like the taste of lamb.


Since F gave me four recipes, I now have three left to try. I will only use fresh ingredients, because, for me, it is not a burden to wash and chop. I will be sure to write a post about them as they are each different from one another: Fesenjan, Dizi, and Tah Chin. (When I re-post the remake for Gormeh Sabzi, I will include the recipe.)

Thanks to Elra for taking us to Iran this week, to Lauren for hosting, and to Susan for having a vision.

Thursday, November 20, 2008

The Happy Waitress

One of the nice things about working from home is being able to call my own shots. Work when I want, cook when I want, play when I want. I think you get the picture. It's why I look forward to the various Internet cooking events and challenges and then actually have time to participate in most of them. Sometimes the challenges match up with a work-related project as well, which is fun.

This month, I've been working on a travel book with a special section on Diners, which fit right in with the November theme for the Weekend Cookbook Challenge (34): Diner Food. Ani, of Foodie Chickie, is the gracious hostess this month. With all the desserts and dinners I've been creating lately, I searched for a menu item that would work for breakfast or lunch. I came across a reference to a sandwich that sounded interesting and delicious. It's basically an open-faced grilled cheese sandwich with bacon and tomatoes. Since I love grilled cheese, and you can never go wrong with bacon, I knew this was the right choice. While I forgot to add the French Fries in my hunger and excitement, it still made a delicious lunch.


I present to you the Happy Waitress:


Butter and grill two slices of bread. Top with bacon strips and tomato slices followed by a slice of American or Cheddar cheese. Grill or toast until cheese is melted. Serve with French Fries.

Thanks to Ani for hosting and to Sara of i like to cook for creating this event. I look forward to next month.

Barefoot Bloggers Bonus: Chive Risotto Cakes


Knowing that I would be using rice in several dishes this week, I prepared a large amount this past weekend. So, yesterday, I was down to the wire for making the Chive Risotto Cakes, a November bonus recipe chosen by Deb of Kahakai Kitchen.

I had planned to make them Tuesday night, but that didn't happen. And yesterday, I was headed to the dentist for some heavy-duty dental work, so I knew I wouldn't be able to eat much for a day or two. I decided to have dinner for lunch and made the cakes in the early afternoon.


Now, all the ingredients were chilled, just not chilled together, so the cakes refused to stay in one piece. I felt like I was frying chive risotto crumbles. So maybe there is something to mixing the ingredients and having the entire mixture chill as one.


Even so, they turned out fine and were delicious. I had two hot ones with lunch, then refrigerated the remaining ones. By dinnertime, I couldn't feel, chew or taste much, so I ended up eating those remaining ones, cold, with a bit of salt. I can say that they are good either hot or cold and definitely worth making.

So, thanks to Deb and the Barefoot Bloggers for a good bonus this month.

(The bonus cakes will have to wait until I can eat again.)

Tuesday, November 18, 2008

TWD: Arborio Rice Pudding


I've eaten a lot of rice this week, helped along by our TWD pick of the week: Arborio Rice Pudding, chosen by Isabelle of Les Gourmandises d' Isa. I still have more rice dishes to go. Some weeks are like that. I usually have a variety of rices on hand: Basmati, brown, and Arborio, since it is a versatile grain.

While I decided to make just half a recipe, I kept the full amount of rice, since it was only 1/4 cup. I was skeptical that such a small amount of rice would really absorb over 3 cups of milk, and after reading comments on the P&Q, that was confirmed. It only took the rice about 35 minutes to cook, so perhaps a longer cooking time would help evaporate the larger amount of liquid. My end result was a nice thick rice pudding, not soupy at all.


I divided the pudding into two parts to try some different flavor combinations. For the first one, I whipped some heavy cream and folded it into the pudding, then sprinkled the top with nutmeg. It reminded me of fluffy tapioca, which I love.


To the remaining pudding, I added some raspberries, since I was in a fruity mood rather than a chocolate one. Chocolate just seemed a bit heavy to me and I felt the fruit would give the pudding a bright touch. The basic rice pudding is such a blank slate, so playing around is encouraged.


For other tasty renditions, check out the other TWD blogs.

Saturday, November 15, 2008

My Kitchen, My World: Puerto Rico


This week the MKMW group traveled to Puerto Rico, courtesy of Lauren, of I'll Eat You. Several years ago I had the opportunity to spend a week in Puerto Rico. The first few days, we stayed in a B&B in Old San Juan, walking all over the city, enjoying the sights, and touring interesting places. Then, we got our rental car and spent several days driving all over the island, from end to end and top to bottom. I know I have photographs buried somewhere, so I'll have to continue searching, but we did have a fabulous time, playing in the mountains and the oceans and the tropical forests. And, of course, food was part of that experience.

For my dining pleasure tonight, I decided to marinate two boneless chicken breasts in this:


The actual marinade consisted of 1 ounce rum (hand carried back from the Bacardi distillery in San Juan, I might add), 1 ounce soy sauce, 1/2 ounce fresh lime juice, 1 teaspoon minced garlic, 1 teaspoon minced fresh ginger, 1 tablespoon minced onion, 1/2 teaspoon dried thyme, 1/3 teaspoon dry mustard, and a couple of pinches of crushed red chiles.


The chicken breasts were marinated for 4 hours, then baked at 350 degrees F for 25 to 30 minutes, or until tender and cooked through.

Meanwhile, I took one of these:


No. It's not a banana. It's a plantain, and I turned it into tostones. I peeled the plantain, then made inch thick diagonal slices and sauteed them, flat ends down, until brown on each side. Because of the sugar content, you must watch carefully so they don't burn. When the slices were browned, I removed them, drained them on paper towels, then took my handy-dandy custom-made wooden mallet and mashed them flat. After creating the little plantain patties, I put them back into the frying pan, and cooked them until they were golden brown. Upon removal, I put them back onto paper towels to drain, then sprinkled them with salt.


To plate, I served the chicken with rice and the tostones, topped with sour cream and some minced green onion.


I have to declare, that while the chicken was tender and flavorful, those tostones were out of this world! I will definitely make them again, and maybe use two plantains instead of one.

Now, I'm looking forward to seeing where we travel this coming week.

Wednesday, November 12, 2008

Barefoot Bloggers: Herb Roasted Onions


Ah, today. Just another normal day in the ‘hood.


Not.


Best laid plans and all that.


You see, having had a busy Monday and Tuesday, I had hoped to get caught up on work today. Yep. Just a quiet day, get my quota done, settle in to watch the new season of Top Chef (one of the cheftestants is a local guy! Root root root)


But no. I had gone up to the kitchen to fix lunch, around noon. As my lunch was thawing out, I stepped to the living room window to check out the scene. Is that a strange car parked across the street? Must. Get. License Number.


Oh, wait. What the heck is that? Let’s see, 8 police cars (3 unmarked), 2 canine units, one ambulance, one fire truck. Something must be going on. . . .


Two hours later I came back in the house, trying to refocus on work and lunch.


Any guesses? That’s right. The police hit the drug house this morning, complete with bullet-proof vests, firearms, battering rams, canines, the whole she-bang. While I missed the initial entry, I was able to join my fellow conspirators neighbors to see much of what transpired. While this may only be the first of many hits, the police scored a notorious drug dealer and a quantity of substances. Even as recently as tonight, several more suspects were nabbed. Apparently, the grapevine is out of commission, so even though clients are showing up to an empty house, they aren’t getting away.


And, can you believe there’s a 5-year-old girl living with all this? Mercifully, the police timed the raid while she was in kindergarten, and the grandparents took her home from school, but my word. . . .


Now to the task at hand. Onions.


Kelly from Baking With The Boys chose the first recipe of November for Barefoot Bloggers, Herb Roasted Onions. These were simple to prepare and delicious to boot. I served them with roasted chicken thighs and roasted potatoes – everything cooked together (separate pans lined with non-stick foil), so there was minimal clean up and minimal effort. I highly recommend them as a side dish. I probably should have made more, since I had leftover chicken, and when I reheated it tonight, I really wished I had onions to reheat along with it.


(I did have a green vegetable to go along with everything else, so it was a balanced meal.)


Tuesday, November 11, 2008

TWD: Kugelhopf


Unlike many of the other TWD bakers, I did not have any problems with my kugelhopf this week. Even making only half a recipe, there were no difficulties – the dough came together nicely, dried sour cherries replaced the ubiquitous raisins, the first rise took less than 90 minutes, the stay in the refrigerator went fine (no partying over night), and the final rise went smoothly.

Well, more or less.

I had this brilliant idea, you see. Because I had a guild board meeting this morning, I figured it would be a perfect time to do the final rise, since I would be gone about 3 hours. Only, I was gone nearly 4, so the poor dough was basically overproofed by the time I arrived back home. As I walked in the door, I could smell a slightly yeasty aroma wafting through the air. Hmmm, I said to myself, I wonder what that’s from. (Duh, can we say ‘momentarily clueless’?) Oh, right, ack! the kugelhopf. The kugelhopf that should have been in the oven an hour ago.

Not to worry, though. I heated the oven, put it in to bake, and 25 minutes later I had a lovely kugelhopf. The major change I made was the pan. I don’t have the prescribed pan, and my bundt pan would have been too large, so I ended up using my Wasserbadform pan, which was only a tiny bit too large, but more contained than the bundt pan. Anyway, the end result was just fine.

I brushed the hot kugelhopf with melted butter and sprinkled on the granulated sugar. As it cooled, a nice crust formed on the outside. After dinner, I was finally able to cut a slice. I really liked the yeasty flavor, the tang of the sour cherries, and the open texture.

To me, this is more bread-like than cake-like, a definite cousin of brioche. Adding some lemon zest would really add a pop to the overall taste, I think. Maybe a bit more salt. So, now I will be on the lookout for a kugelhopf pan so I can make this again and do the full recipe with a few changes.

Thanks to Yolanda of The All-Purpose Girl for choosing such a challenging recipe. I know the other TWD bakers will have much to say about this one!