Thursday, July 31, 2008

Barefoot Bloggers Bonus

Or, what is that big lump of white stuff?


Well, my dear, that is rustic Coeur á la Crème, a decadent cheese & cream dessert served with a delicious mixed berry sauce. You like? Why, yes. Yes, I do.


Actually, we both liked it. This is a very simple, but elegant, dessert, and it was chosen this month as a bonus recipe by Becke of Columbus Foodie. I recall making this years ago, and have always wanted to make it again.


My only issue with this particular recipe is textural. I remember, from the earlier experience, that the crème was much firmer, more like a soft, spreadable cheese, while this one basically started to melt after a short time at room temperature. I did observe that no liquid ever drained from this mixture, although the paper towels were soaked. This presents a challenge that I will have to research. Maybe I can remember where I found the earlier recipe and compare the two. I think I used sour cream rather than heavy cream, though.


All that aside, I would highly recommend Coeur á la Crème as an easy and delicious dessert for entertaining. Great choice, Becke, for the bonus.


(For this particular recipe, I halved the ingredients for the cheese/cream part, and quartered the ingredients for the sauce. I mixed some frozen mixed berries, 2 tablespoons sugar, about 2 tablespoons water, plus about 1/4 cup of jam (currant and raspberry) in a small sauce pan, boiled it for several minutes, then strained it. Seemed to work just fine. You could add any alcoholic flavoring of your choice as well after it cools.)

Tuesday, July 29, 2008

Daring Baker's Filbert Gateau


Once again, the time has come to unveil the latest project from the Daring Bakers. The July challenge, Filbert Gateau with Praline Buttercream, was chosen by Chris of Mele Cotte, and it was definitely a challenge for many bakers. In reality, though, it was just a cake – a cake with many parts to it – but nonetheless a cake. Don’t get me wrong now. I love cakes and I love baking cakes, and I really enjoyed this one – both the challenge of baking it and the deliciousness of eating it. It is a cake worth baking again.


When the recipe was first announced, I immediately checked with my local library to see if they had a copy of the cookbook, Great Cakes by Carole Walter. Within the hour I had the book in my possession, where I could peruse it at leisure and really study the recipe and the required steps.


Then, I went in search of the key ingredient – filberts, aka hazelnuts. When I lived in Oregon, I had an endless supply of them, which pretty much spoiled me. But I knew exactly where to go here in my area: the Somis Nut House. I bought everything I needed, nutwise, and more. (Isn’t that always the case?)


So, first I made the nut brittle for the praline. Watching the sugar carefully is the key here, for it caramelizes quickly and could burn in an instant.


The only issue I had with the whole challenge was making the praline paste. I processed it seemingly forever, but it just wouldn’t turn into a paste. Maybe I should have let it go a little longer. I don’t know. It looked fine and tasted fine, but did cause problems in the decorating stage.


The rum syrup was quickly made and set aside.

Next, it was time for the cake. Since I decided to make half a recipe, I needed a 6-inch cake pan. The one I bought was only 2 inches high, so I poured the small bit of excess batter into a greased ramekin. I ended up with a 6” cake and a small cake, but that was kind of fun, since I could take a test run on the small cake.


(clarified butter)


(beaten egg mixture)


I have to say that the cake turned out perfectly. It was beautiful. The nuts were evenly distributed, it didn’t sink in the middle, and it didn’t stick to the pan. It was just the right thickness to be divided into three layers.


After the cake came the buttercream. This was straightforward. I’ve never had a buttercream fail, and this was no exception.


By this time the cakes were cool, so I split both of them into three layers each and began assembly.


The cakes were first soaked with the rum syrup, then I put a thin skim coat of buttercream over the top, followed by the ¼ -inch-worth of buttercream filling. Then the cake went into the fridge to chill.


While chilling, I made the apricot glaze.


Next came the glazing operation. The cake was trimmed around the sides and the warm glaze was applied, before returning the cakes to the fridge.


During the last chilling session, I made the chocolate ganache glaze, finely chopping bittersweet chocolate and whisking it until melted and velvety smooth. The ganache was then poured over each cake, resulting in a smooth, shiny coating of chocolate.


The final step was decorating the cake with some reserved buttercream. The praline bits kept clogging the piping tip, which was very frustrating, so the decorating part is not lovely to behold.


We tested the small cake first, and pronounced it delicious.


I never did get a piece of the large cake. My daughter took it with her to work at the yarn shop, so she could share it with all her knit-sisters. They made her call me so they could all yell over the phone how good it was. Sounds like it was a hit!


I would certainly make this cake again for a special occasion. The first time using a recipe is always the most time-consuming, because it’s unfamiliar territory. The succeeding times usually go much more quickly, especially since the parts can be prepared over a several day period.


For a copy of the recipe, go to Chris’s blog, or find a copy of Walter’s book, which has many more delicious cake recipes in it. You can also take a look at nearly 1000 variations at the Daring Bakers site.


(Note: not wanting to waste the leftover tiny bits of nuts that were strained out, I used them in a cookie recipe that called for finely chopped nuts.)

BBD12: Small Breads

There’s been a ton of baking going on here this month. And, while it seems that breads have been put on the back burner recently, I think I remember baking some earlier this month. I wasn’t really procrastinating with this post, since I was hoping to bake one more batch of bread before the end of the month, but, alas, the end is nearly upon me, and there is no more time. So, without further ado, here’s my contribution to this month’s Bread Baking Day (BBD#12), Small Breads, hosted by Aparna of My Diverse Kitchen.


First up were plain white bread dinner rolls. They may be plain, but they are easy and delicious. The recipe is from Peter Reinhart’s Bread Baker’s Apprentice, and it’s one of the few recipes that doesn’t require a 2 to 3 day process. I needed something quick, and this was my choice. I barely had one before they disappeared.


The second offering, also from BBA, is the English Muffin recipe camouflaged as breadsticks. I had to fight for my share, they were that good.


Finally, I got tired of throwing out my toss-off every time I fed my sourdough starter, so I decided to use some for muffins. This recipe comes from Breadchick Mary’s blog and is very versatile. I threw in some dried sour cherries, which complemented the tanginess of the sourdough muffin.


Now, I had a long list of other small breads that I wanted to try, but I truly ran out of time, what with cookies, cakes, pies, ice cream, etc. also on the agenda. I think Aparna’s selection of small breads was wonderful. And, I also thank Zorra for creating one of my favorite monthly events.

Monday, July 28, 2008

TWD: Summer Fruit Galette


Apples, you say?


Summer, you say?


But, of course, I say!


These are Anna Apples, given to me this weekend by the same friend who gave me boysenberries several recipes ago. Here is a bit of background on this variety of apple:


Anna Apple is green with red blush. Sweet, crisp, flavorful; best fresh or cooked. Heavy crops even in low desert of southern CA or AZ; good keeper. Self-fertile or pollinated by Dorsett Golden. Zones 5-9. 200 chill hours required. Harvest July 1 - July 15.


This week’s TWD recipe was brought to you by Michelle of Michelle in Colorado Springs: the Summer Fruit Galette. I love galettes. They are almost easier than pies, and have a pleasant, rustic feel to them. I’ve made them with a variety of fruits, but never quite like this, with the added custard.


I missed the Saturday farmers market this week because of a planned trip to Long Beach, and I didn’t really want to use store-bought fruit, assuming it would even ripen in time. But when my friend came to pick me up, she brought a bag of Anna apples with her, so the light bulb went on, so to speak, and I knew they would be the focus of my galette.


I did sauté the apples briefly in some butter and sugar so they would be cooked through.


In place of jam, I finished off a jar of Cinnamon Candy Apple Butter,


and in place of the graham cracker crumbs, I used some of the plain bread crumbs that I had used in the blueberry pie. They would serve the purpose of absorbing extra juices without affecting the flavor.


When it came time to pour on the custard, I ended up using it all, and nothing leaked out. The final result was about as perfect as it comes.


Thanks, Michelle. This was a great choice for an easy, delicious summer dessert, and you’re bound to see all kinds of variations when you visit the other TWD blogs.


Red, White, and Swiss

In June of 1999, I attended a wedding. Aside from my traveling companion, the only person I knew among the 50 participants was the groom. His bride-to-be wanted to have the marriage ceremony at her ancestral family home, so all the guests had to travel there if they wanted to attend. Normally, this is a fairly common occurrence, unless, as it was for this particular wedding, the location is half way around the world in a remote valley in Switzerland. But, hey – any excuse for travel and a three-day party, right?


The final destination for the wedding party was Val Fex, in the Engadine region of Switzerland, near the Italian border. The last town before entering the valley proper is Sils Maria. Beyond that, there are no cars allowed. You either walk or find local transportation. We had flown into Paris and driven across France, into Switzerland, so we had to park the car in Sils Maria and wait for someone from the guest house to come retrieve us and our luggage.


There were (at the time) three lodgings in Val Fex. At the lower end of the valley, there was the 5-star fancy hotel. That’s where the wedding party stayed and where the wedding dinner was held. It was delicious as I recall, but the standout was a White Tomato Soup with Basil Oil. (If anyone has the recipe for that, I’d be forever in your debt!)


About halfway up the valley, there was a pleasant inn, not fancy, not rustic, but sort of an ordinary lodging.


Finally, at the farthest end of the valley, was a rustic lodge. That’s where we stayed. So, we got lots of exercise walking up and down the valley to the various events. If you wanted to hike, all you had to do was step out the door.


The church where the actual ceremony was held was sort of in the middle of the valley. It was old and full of history, with original frescoes decorating the walls. The bride’s family had been using it for many generations. I have an unforgettable memory of the wedding day itself. At our lodging at the top of the valley, we dressed for the occasion, then proceeded to walk down the valley to the middle inn, where we picked up the groom and his brothers. Our group kept growing as we walked to the small church, and the local residents and local cows were enjoying the sight. The bride and her family were staying at the 5-star hotel, and they arrived at the church in horse drawn carriages. When the ceremony was over, the bride and groom left the church in the carriage, and the remaining guests walked down to the large hotel to begin the festivities.


During free times, we explored the area. One day we went to the town of Soglio, right on the Italian border. It was raining that day, but we still had a wonderful time. We visited a local museum, had tea in a small café, and walked through the narrow streets until we found a busy restaurant serving lunch. The museum had many interesting displays, including geologic maps of the area and sculptures by the Swiss artist, Alberto Giacometti. It was the first time I had heard of the artist, Giacometti, but since then I’ve seen his work in many places.


While this is sort of a round-about way to celebrate Swiss National Day on August 1, I wanted to share one of my travel experiences in Switzerland to help Zorra feel less homesick, although it might just aggravate her condition!


Swiss National Day - Red, white or Swiss


Although a bit out of season, my entry for this event is a Swiss holiday cookie, Zimtsterne. There appear to be several versions of this cookie, but all are very tasty, and since I had some finely chopped hazelnuts remaining from a recent project, it was a perfect recipe for me.


So, happy Swiss National Day to you, Zorra. Maybe if you have a cookie, you will feel better!


Zimtsterne


3 tablespoons butter

1 ½ cups sugar

2 whole large eggs

1 large egg, separated

1 teaspoon lemon juice

2 1/3 cups all-purpose flour

2 ½ teaspoons baking powder

1 ¼ teaspoons cinnamon

¼ teaspoon salt

¼ teaspoon nutmeg

½ cup finely chopped nuts (walnuts, hazelnuts, almonds)


Heat oven to 375F.


In a mixer, blend butter, sugar, the 2 whole eggs, the 1 egg yolk, and lemon juice until light and fluffy. Stir dry ingredients together; add to butter-sugar mixture. Stir in nuts. Roll the dough, one third amount at a time, to 1/16” thick on a lightly floured board. Cut with a star cookie cutter. Brush the tops with the remaining egg white, beaten until frothy. Bake on a lightly greased baking sheet about 6 to 8 minutes.


Makes at least 4 dozen cookies, depending on the size of the cookie cutter.


Sunday, July 27, 2008

SHF #45: Berries!


My town is surrounded by strawberry fields. We can buy the ripe, red berries nearly all year round, either from roadside stands, the farmers markets, or the local groceries. I went to the Wednesday farmers market this past week to buy a few fruits and vegetables, including some fresh strawberries, with the purpose of trying some new recipes.


The July edition of Sugar High Fridays is being hosted by Susan, of Food Blogga, my fellow blogger down the road a piece. She selected berries for the theme, and while there are many kinds of berries from which to choose, and all are delicious, strawberries are the most appropriate choice at the moment for where I live.


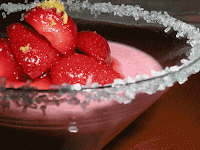
I decided to make another panna cotta from Camilla Saulsbury’s book, Panna Cotta. All I can say is Wow. This turned out to be one of the most luxurious and delicious desserts I have ever tasted. It is so simple to make and so beautiful in appearance, that it is going to become one of my ‘entertaining’ desserts. So, this is my submission for SHF #45: Berries!


Strawberry Daiquiri Panna Cotta

(adapted from Panna Cotta by Camilla Saulsbury)

2 ½ cups strawberries, hulled and halved (and divided)

2 tablespoons light rum

1 teaspoon unflavored gelatin

¾ cup heavy cream

¼ cup sugar

½ teaspoon finely grated lime zest

1/3 cup sour cream

1 ½ tablespoons fresh lime juice

1 ½ tablespoons honey

Garnish: coarse sugar, lime wedges, freshly grated lime zest


Place 1 cup of the strawberries in a food processor and process until smooth. Pour the purée through a fine mesh strainer, pressing with a rubber spatula to extract as much purée as possible. Reserve the strained purée and discard the remains in the strainer.


Place the rum in a small bowl. Sprinkle the gelatin over the rum and let stand for 5 minutes to soften.


Place cream, sugar, and lime zest in a heavy saucepan and bring to simmer over medium-high heat, stirring until the sugar dissolves. Remove from the heat and whisk in the gelatin mixture until dissolved. Whisk in the puréed strawberries, sour cream, and lime juice until blended.


Pour mixture into 4 margarita glasses. Loosely cover with plastic wrap and chill at least 4 hours.


Gently toss the remaining 1 ¼ cups strawberries with honey. Let stand at room temperature for 30 minutes. Chill until ready to use.


Spread the coarse sugar into a wide bowl. Rub a lime wedge around the rim of each glass, then dip glass into the coarse sugar, coating the edge. Spoon the strawberries and the juices on top of each panna cotta. Garnish with lime zest.


Serves 4.

Can be doubled.


Thanks to Susan for the delicious berry theme, and thanks to Jennifer, the Domestic Goddess, for creating this event.

For Sher: Meatless Tamale Pie


One week ago, the food blogging community suffered an unexpected loss. Sher, of What Did You Eat, passed away suddenly. I had a few conversations with Sher, particularly regarding breadmaking, so I wanted to pay tribute to a kind, caring, and humorous fellow baker.


In searching Sher’s blog, I came across a delicious recipe for which I had all the ingredients: Meatless Tamale Pie, which Sher posted on August 21, 2007 for Weekend Herb Blogging. It was especially tasty, reheated, the next day, since even half a recipe feeds a lot of people!


So, in memory of a fellow blogger and baker, I offer Sher’s Meatless Tamale Pie.


Meatless Tamale Pie


(Bon Appétit, January 1999)


Serves 8.


ingredients


1 pound poblano chilies or 2 cans roasted poblanos or green chilis (use only one can, if you prefer)
2 tablespoons olive oil
4 1/2 cups frozen corn kernels
1 to 2 jalapeño chilies, seeded, finely chopped
2 garlic cloves, chopped
1 1/2 teaspoons ground cumin
1 1/2 teaspoons dried oregano
1 14 1/2-ounce can diced tomatoes in juice, drained, 3/4 cup juice reserved
3/4 cup thinly sliced green onions
1/2 cup chopped fresh cilantro
1 15 ounce can drained black beans (About 2 cups)
1 1/2 cups shredded sharp cheddar cheese
1 1/2 cups shredded Monterey Jack cheese
7 cups water
1 1/2 teaspoons salt
2 cups yellow cornmeal
1 cup plain yogurt or sour cream
Tomatoes, sliced
Fresh cilantro sprigs


preparation


Roast poblano chilies over gas flame or in broiler until blackened on all sides. Enclose chilies in paper bag. Let stand 10 minutes. Peel, seed and coarsely chop chilies. If using the canned chilis, drain and clean out the seeds, then chop coarsely.


Heat 2 tablespoons olive oil in heavy large skillet over medium-high heat until hot. Add corn kernels (don't bother to defrost) and cook until beginning to brown, stirring occasionally, about 5 minutes. Add jalapeño chilies, garlic, cumin and oregano; sauté 2 minutes. Remove from heat. Mix in roasted poblano chilies, canned tomatoes, 1/2 cup reserved juice from canned tomatoes, green onions and cilantro. Season with salt and pepper.


Preheat oven to 350°F. Lightly oil 15 x 10 x 2-inch glass baking dish. Combine 5 cups water and 1 1/2 teaspoons salt in heavy large saucepan. Bring to boil. Combine cornmeal and remaining 2 cups water in medium bowl. Gradually whisk cornmeal mixture into boiling salted water. Reduce heat to medium-low. Cook until cornmeal is very tender and mixture is thick, stirring often, about 14 minutes. Remove from heat and mix in yogurt.


Spread 2/3 of cornmeal over bottom of prepared dish (cover remaining cornmeal to keep warm). Arrange black beans over cornmeal in dish. Sprinkle beans with salt and pepper. Sprinkle 2 cups cheese over beans. Spoon corn kernel mixture evenly over cheese, spreading with spatula. Spread remaining cornmeal evenly over corn kernel mixture. Arrange tomato slices atop cornmeal, pressing gently. Sprinkle with salt and pepper. Drizzle remaining 1/4 cup juice from canned tomatoes over. Sprinkle remaining cheese evenly over casserole.


Bake casserole uncovered until heated through and top is golden, about 1 hour. (Can be made 1 day ahead. Cool slightly. Cover and refrigerate. Rewarm, covered with foil, in 350°F oven until heated through, about 30 minutes.)


Let casserole stand 15 minutes. Garnish with cilantro sprigs and serve.


Serves 8.

Friday, July 25, 2008

One frozen yogurt down, one to go


Because I love lemons and limes so much, I’m always on the lookout for recipes that feature them. I also have an inordinate fondness for ice cream. One of my favorite ice cream flavors is lemon custard. I’ll even pass up chocolate for that one. It’s not easy to find either, but I have been known to drive some distance to eat some. My favorite place for lemon custard is the Superior Dairy, in Hanford, California. Seriously, one scoop will feed 3 people. If you’re ever traveling anywhere near Hanford (in the San Joaquin Valley), I would strongly suggest stopping and spending some time there. Along with the ice cream, there are interesting things to see and do in the area.


But, I digress.


Recently, one of my friends, Megan (My Baking Adventures), suggested I try her lemon frozen yogurt – for her that was an adventure in itself! So, I did. I just finished a small bowl, for test purposes only, and found it to be delicious, with a lemony, tangy goodness. It would be perfect on a hot, hot day. Check Megan’s blog for the recipe and story.


Coming up soon will be another Megan-inspired frozen dessert – strawberry frozen yogurt. I will have some leftover strawberries from my current project, so they won’t go to waste. I had read about the different ice creams in the June issue of Food & Wine, so this gives me added incentive to experiment.

Red, White, and Blue


At last, I have finally made my ‘personal best’ cupcake. I’ve been trying for months to make a decent one; it seems like everyone else in the world can, except for me. So, for the last several months, cupcakes have been on the back burner, so to speak, while I’ve participated in other challenges.


But July was different. Clara and Nikki, the July hostesses for Cupcake Hero, announced a theme of Red, White, and Blue. For some reason, it felt like the right time to try again. I played with ideas for a week or so, then one night everything fell in to place.


First, there was the cupcake itself. I hadn’t found quite the right recipe yet, but thanks to Mary, I had inspiration. There, in the Small-Batch Baking cookbook was a recipe for a simple cupcake. It only made four, so if I blew it, I wouldn’t be stuck with dozens, and, of course, my growing waistline doesn’t need extra encouragement. So, step one was complete.


Second, I really wanted to make that gooey meringue-type frosting, and as if the cake recipe was reading my mind, it called for only one egg yolk. That left a lonely egg white. Looking in Dorie’s cookbook, I found the frosting recipe, and by quartering it, I only needed one egg white and I calculated it would be more than enough to frost four cupcakes. Step two was complete.


Now, for the color combination. White cake? Already done. Red cake? Already done. Blue cake? Why not? I just happened to have red chips (cherry flavor), so with a blue cake, red chips, and white gooey frosting, I finalized my plan. Hopefully, the execution would work.


Amazingly, it all came together. When the cupcakes were finished, I couldn’t believe I had actually made a decent-looking and tasting cupcake. My daughter said they actually tasted like the Fourth of July, and I had to agree. That hint of cherry flavor, a successful cake recipe, and the gooey top made the difference.


So, after several months hiatus, I am, once again, submitting a cupcake to Cupcake Hero. I’m looking forward to seeing all the red, white, and blue combinations from all the creative and talented bakers. Thanks to Clara and Nikki for choosing a fun theme, and to Laurie for creating this delicious event.


Simple Cupcakes

(adapted from Small-Batch Baking by Debby Maugans Nakos)


2 tablespoons unsalted butter, at room temperature

½ cup all-purpose flour, sifted

¼ cup buttermilk

1/8 teaspoon baking soda

1 egg yolk, at room temperature (large egg)

½ teaspoon vanilla

¼ cup plus 2 tablespoons sugar

1/8 teaspoon salt


1 standard muffin pan


Preheat oven to 350F. Grease and lightly flour 4 of the muffin cups, or use paper liners.


Combine the buttermilk and baking soda in a measuring cup; stir to mix. Add egg yolk and vanilla, and gently mix.


Put flour, sugar, and salt in a medium-sized mixing bowl and whisk to blend. Add the butter and half of the buttermilk mixture. Beat with a hand-held mixer on low speed until the dry ingredients are moistened. Increase the mixer speed to medium and beat until light and fluffy. Scrape down the sides of the bowl, if necessary. Add the remaining buttermilk mixture and beat on medium speed until well blended.


At this point you can add coloring or fold in chips or nuts.


Spoon the batter into the prepared muffin cups, dividing it evenly. Fill any empty cups half-way with water. Bake about 20 to 25 minutes, or until a toothpick inserted into the center of one cupcake comes out clean.


Remove from oven and place on wire rack for 10 minutes. Then remove the cupcakes from the pan, place them on the wire rack and let them cool completely.


Frost and decorate as desired.


Makes 4 cupcakes.


Thursday, July 24, 2008

MeMe time

So, Megan, from My Baking Adventures, decided she wanted to know more about me. Well, my response may give everyone more information than they care to know, but since I enjoy learning more about other food bloggers, it's only fair to reciprocate.

First, the rules:

1. Link to the person who tagged you.
2. Post the rules on the blog.
3. Write six random things about yourself.
4. Tag six people at the end of your post.
5. Let each person know they have been tagged by leaving a comment on their blog.
6. Let the tagger know when your entry is up


Second, what you've all been waiting for:

1. I’m self-employed and work from home. On the positive side, I can set my own schedule; on the negative side, I work every day of the week.


2. Along with cookbooks and cooking-related magazines (a given), I collect fabric for quilting. I have a closet full and the collection keeps growing. My favorites are bright, clear colors and anything with metallic gold. To feed my addiction, this coming weekend I’m going down to the International Quilt Festival in Long Beach. (I won’t be working on Saturday; see #1)


3. From 1994 to 2005 I had the opportunity to do quite a bit of traveling. I’ve been to England, France, Germany, Netherlands, Austria, Slovakia, Poland, Italy, Switzerland, Portugal, and Spain; a bunch of Caribbean islands, Puerto Rico, Mexico, and Canada; and 37 of the 50 US states.


4. In high school and college, my passion was foreign language. I speak French, Russian, Spanish, a bit of Japanese, and some American Sign Language. I can read and understand several other languages as well.


5. I’ve been cooking since I was 8. I had a fabulous home-ec teacher in high school, who taught me how to make bread and pie crust, fix any kind of vegetable, select cuts of meat, and do just about anything in the kitchen. I’ve taken informal cooking classes over the years, and have just completed 2 + years of official culinary school.


6. I can bray like a donkey.


Third, I tag the following people:

Judy
April
Jessica
Dolores
Barbara
Pamela

(unless you've been tagged recently)