Monday, June 30, 2008

TWD: Apple Cheddar Scones


One of the best breakfast treats has to be scones. They are quick, delicious, and can be made in a variety of flavors. This week, our TWD recipe was Apple Cheddar Scones, chosen by Karina of The Floured Apron. Instead of fresh apples, this recipe uses dried apples, which can be one of those pantry staples that are always on hand. I like the sliced and dried Granny Smith apples from Trader Joes, as well as their super extra sharp cheddar cheese. I chopped the apples and grated the cheese the night before to save both time and dirty dishes. The next morning the scones were quickly assembled. But, tell me, who can really wait 10 minutes to eat one, especially slathered with butter?!


My OTT (official taste tester) is not fond of cooked apples. (See Danish braid from a recent post.) However, she did comment that the apples in these scones weren’t overpowering, and proceeded to help herself to 4 or 5. Hmmm. Guess not then. In spite of snarfing down a bunch, she did request that I make them again sans apples.


Since I love cooked apples in any form, I thought these were delicious, and will most likely make them again very soon. Many of the other TWD bakers made the scones this week, so please visit their blogs and get more opinions first hand.

Sunday, June 29, 2008

BBD11: Breads with Sprouts

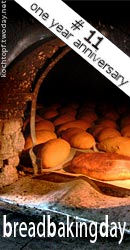
Bread Baking Day #11 - one year anniversary: Bread with sprouts


This month marks the 1st anniversary of Bread Baking Day, so it was fitting that the hostess was Zorra, the talented creator of this baking event. As the theme, Zorra (1x umrühren bitte aka kochtopf) chose breads with sprouts. I’ve eaten sprouted breads, but have never baked them myself, so it took considerable research to find an appropriate recipe, specifically one where I had all the required ingredients.


Now, I fudged a bit. Years ago, I used to make sprouts, so somewhere, buried in a box, is the appropriate jar with mesh top. But, I knew that if I searched, I might not get the bread baked. I also had to figure out where I could buy wheat berries, which could prove challenging. I recalled that one of the vendors at our Saturday Farmers Market sold a large variety of sprouts, so last Saturday (6/21), I made the trek downtown and picked up a small bag of sprouted wheat berries.


Then, even though that Saturday was unbearably hot here, I baked 2 batârds of sprouted whole wheat bread. Well, a better description would be 2 doorstops. The bread tasted good and looked good, but was hard as a rock and only got harder as it cooled.


Shoot.


So, yesterday morning (6/28), I drove downtown again to get another bag of sprouted wheat berries. When I returned home, I searched again for a different recipe, and finally found a simple one that had possibilities. Today isn’t as hot, thankfully. The new recipe also uses a bread machine, so I took advantage of the mix, knead, and rise cycles, but decided to shape and bake the loaf in a conventional manner. All went well this time. I ended up with a gorgeous loaf of bread. It will be perfect for sandwiches.


White Sprouted Wheat Bread


1 cup water

2 1/2 tablespoons butter

1 1/3 teaspoons sugar

2 teaspoons salt

2/3 cup sprouted wheat berries

3 1/3 cups bread flour

1/4 cup dry milk

2 1/2 teaspoons instant yeast (or bread machine yeast)


Place all ingredients into the bread machine pan in the order recommended by the machine manufacturer. Select the Basic/White bread cycle and press start. If you wish to shape and bake the bread in a conventional manner, also select the Manual cycle. When the dough has completed the knead and rise cycles, remove it, shape, and let have its final rise. Bake at 375°F until the internal temperature is between 190°F and 200°F. My loaf baked for one hour.


I have to say, that the Sprout Lady at the Farmers Market has a nearly infinite variety of sprouts. One can purchase them singly or mixed together, but they all look quite tasty. It might be fun to experiment with the different flavors and textures in future breads.

Daring Bakers = Danish Braid


While eating a piece of the Danish Braid, my official taste-tester announced, that if she died right then and there, she would die happy. And she also requested that this be a regular, weekly (if not daily) staple in our diet.


That is my consensus as well.


This month’s Daring Baker challenge was to create the Danish Braid from Sherry Yard’s cookbook, The Secrets of Baking. I’ve owned this book for awhile now, so I was pleased to be able to finally bake something from it! And, while I’ve made puff pastry and croissants many times, I haven’t make Danish dough, so this was a good and easy challenge for me.


The dough, itself, is delicious. I love the combination of the cardamom and the orange; the bread would seem bland without it. I had no issues with creating the laminated dough; the butter behaved itself throughout the process.


For this challenge, we were allowed to choose the filling, so to please all potential tasters, I chose a cream cheese filling, spiked with lime zest. Here’s the recipe:


Lime Cream Cheese Filling


8 ounces cream cheese

4 ounces granulated sugar

1/8 teaspoon salt

½ teaspoon vanilla extract

1 tablespoon flour

½ an egg yolk

¼ teaspoon lime oil

1 teaspoon lime zest


Beat the cream cheese until light and fluffy. Stir in the remaining ingredients. (This is half of the original recipe, but it made enough to fill two braids.)


The only concern I had with this recipe was that the braid, itself, just didn’t seem to want to do that final rise before baking. I baked off both halves of dough, and neither one rose much, if at all, during the final stage. I know the yeast was viable, but I also know that sweet, rich doughs have a more difficult time rising, so perhaps that was the case here. Even though they were a bit more dense than I prefer, they both tasted delicious. In the interest of science, I will most likely make this kind of dough again, but use a different recipe for comparison.


Thanks to this month’s hosts, Kelly, of Sass & Veracity, and Ben, of What’s Cookin’?, for choosing a delicious challenge. When you have a spare moment, take a look at 1000+ more variations on the Danish Braid at the Daring Bakers blogroll.


For the Danish recipe, go to Kelly's blog.

Thursday, June 26, 2008

Barefoot Bloggers: Parmesan Chicken

Once again it’s time to talk about a delicious recipe from the Barefoot Bloggers.

This week it is Parmesan Chicken, chosen by Megan of My Baking Adventures.


This is such a simple and delicious recipe, a wonderful way to serve chicken. And you get to release your aggressions by pounding the heck out of it. But only up to a point, or there won’t be any chicken left!


The only change I made was substituting a caesar salad for the lettuce and vinaigrette. It’s what I had on hand and is one of my favorites, so it sounded like a perfect combination. I also decided to live dangerously by having sliced Roma tomatoes on the side. No ill effects.


If there is any chicken left over, it’s really good as a sandwich, too.


Barefoot Bloggers, created by Tara of Smells Like Home, showcases recipes by Ina Garten, the Barefoot Contessa.

Wednesday, June 25, 2008

SHF: Canadian Desserts


While I was growing up in the Seattle area, my family took quite a few vacations into British Columbia – Victoria, Vancouver, Harrison Hot Springs. As an adult, I’ve gone back to BC several times and have enjoyed a few visits to the Niagara region. Over the last few years, I’ve worked on a number of travel guides featuring different regions in Canada. The most recent one gave detailed information on moving to Canada, and it included a section on regional Canadian cuisine. How’s that for timing?


On one of my adolescent trips, I picked up a small Canadian cookbook, Canadian Cuisine, published by the Canadian Government Travel Bureau in Ottawa. I still have it (no surprise), so when the Sugar High Friday challenge was issued awhile back, and I discovered that the focus was on Canadian desserts, I tracked down this cookbook and searched for an interesting recipe. There was Niagara Apple-Cheese Betty, Acadian Blueberry Grunt, Ogopogo Apple Dumplings (that was a close second), and Saskatoon Pie. But the winner turned out to be a dessert I read about in the travel book – Butter Tarts.


I searched the Internet for the recipe, and, decided, in the end, to combine three of them. These tarts are like pecan pies without the pecans. Very delicious. So, for my entry to SHF, hosted this month by the Domestic Goddess herself, Jennifer, I present my version of Canadian Butter Tarts.


Butter Tarts


Filling:

1/2 cup brown sugar

1/4 cup maple syrup

3 tablespoons soft butter

1 egg

1/2 tsp vanilla

1/2 tsp vinegar

Pastry for one 9-inch pie

Lightly grease a 6-hole muffin pan. Roll out the pastry, cut 6 4-inch circles, and carefully fit them into the muffin pan. Refrigerate while preparing the filling.

Mix the filling ingredients together in the order listed. Pour into chilled tart shells. Bake at 400°F for 15 to 20 minutes. The filling will be lightly browned and bubbly, and tart shell will be just turning golden brown.

Cool for 10 minutes before removing from pan. Then finish cooling on a wire rack.

Some recipes add raisins or currants or nuts or both; some are just plain. I wanted to start simply, so next time I’ll add some nuts.

Tuesday, June 24, 2008

RIP

We’ve been having a heat wave here in southern California. The inside of my house has been over 100° F for the last four days (few people have air conditioning here). I am sad to report that I have two casualties, directly related to the hideous hot weather.


My sourdough starter turned pink.


My barm turned gray and little round fuzzy things began growing on the surface.


They both smelled like something out of a gym locker room.


To lose one is bad enough, but to lose both of them at the same time is nigh on heartbreaking. So, there will be no sourdough products from here for awhile. :(

Monday, June 23, 2008

TWD: Mixed Berry Cobbler


OK. I can’t figure out what all the fuss is about. There were comments flying around among the TWD bakers all week about the blandness of the crust on this week’s berry cobbler, but it wasn’t the case for me. Did we all use the same recipe?


Now, I should confess that I made one minor change to the dough recipe – I used salted butter. I prefer salted butter, actually. Sweet butter has no oomph. But other than that, I made no other changes or additions.


So, tonight, I made the berry cobblers, using raspberries and a few strawberries. I patted out each crust, made a heart-shaped hole in the middle, and sealed it on top of the individual ramekins. I did brush the crusts with an egg wash I already had on hand, as well as sprinkle them with some coarse sugar. Then I let them cook until they were golden brown. The nice thing is, you can use any kind of fruit you desire – peaches, apricots, cherries, blueberries – they all sound delicious. The only negative aspect is that the cute heart-shaped hole mostly disappeared. And, instead of ice cream, I whipped up some cream to adorn the tops.


To tell you the truth, I preferred the crust to the fruit filling. Especially the browned bits. But, to each her own.


So, this week, each TWD baker will have his or her own take on this cobbler, which should make some interesting reading. Check it out.


And thanks to Beth of Our Sweet Life for selecting a most talked-about dessert!

Sunday, June 22, 2008

VTV: Bell Peppers


Well, I’m barely under the wire with this week’s VTV entry. It’s been hot as Hades here in southern California this week. Houses here don’t have air conditioning and many are poorly insulated. Last night, at 11:30 pm, the internal temperature of my house was over 100° F. One of my bedroom candles melted. Needless to say, baking is not a pleasant activity at the moment.


I had all the ingredients for this quiche on Friday, except for one, which I had forgotten, even though it was written on my list. So, Saturday, I returned, yet again, to Trader Joe’s to buy my cheese. And, I didn’t get it baked until early this morning, because last night I was at a Solstice/Goddess party. And, the quiche won’t be eaten until tomorrow because I was cooking a special birthday dinner, which will be described in a future post. This is much more drama than normal around here.


But, at any rate, I’m offering this pepper quiche for Vindicate the Vegetable. I’ve amended the original recipe as the notes will indicate. It is so popular, that I usually bring copies of the recipe with me when I bring it to potlucks and luncheons.


If you try it, I hope you enjoy it as much as my family does. Thanks to Nina (Love, Sweet, Love) and Jen (Beantown Baker) for hosting.


Tri-Color Sweet Pepper Quiche

1 10” pie crust

4 T. olive oil

3 medium bell peppers, preferably each of a different color, stemmed, seeded and thinly sliced into 1/8” strips

¼ c. dry white wine or water

salt

1 c. loosely packed basil leaves *

2 T. grated Parmesan cheese *

2 whole eggs plus 2 egg yolks

1 c. half & half

½ c. heavy cream

1 c. grated Provolone cheese **

½ c. pitted and chopped Kalamata olives

Pre-bake the pie crust and set aside. Pre-heat the oven to 400°. Heat 2 T. of the olive oil in a large saute pan over medium high heat and add peppers, stirring occasionally until the peppers wilt, about 10 minutes. Lower the heat to medium and stir in the wine and a pinch of salt. Continue cooking until peppers are soft, not browned, about 15 more minutes.

While peppers cook, put basil, Parmesan cheese and remaining 2 T. of olive oil in blender and puree until as smooth as possible. Set aside. Whisk together eggs and yolks in a bowl. Add half & half, heavy cream and about ½ tsp. salt and whisk again to smooth.

To assemble the quiche: spread basil puree on bottom of pie crust, top with half the Provolone cheese and thenall the peppers. Dot the olives over the peppers. Spread remaining Provolone cheese over peppers and pour in the egg and cream mixture. Bake for 40-45 minutes or until a knife inserted in the center comes out clean and the edges of the crust turn golden. Remove and let sit for 10 minutes and serve.

Cook’s Note *: may use pre-prepared Pesto Sauce in place of the Basil, Parmesan cheese, olive oil step.

Cook’s Note **: may substitute equal amount of Trader Joe’s Quattro Formaggio Cheese Mixture for the Provolone cheese.

Monday, June 16, 2008

TWD: (Peppermint) Chocolate Cream Puff Ring

This week, Caroline, of A Consuming Passion, selected Peppermint Cream Puff Ring as our TWD challenge. We had several options for the filling – a peppermint flavored whipped cream, ice cream, and a chocolate pastry cream. After checking the ingredients on hand, I chose the chocolate pastry cream.


The pâte à choux was straight-forward to prepare. After boiling the liquids and stirring in the flour, I let the mixture cool ever so slightly before beating in the eggs. Then, I piped a large ring, per Dorie’s instructions, with just enough left over to make four small cream puffs. They were all baked together, following the recipe instructions, and came out perfectly puffed and golden brown. When the ring was cool, I sliced it in half and filled it with the chocolate pastry cream, then reassembled it before spreading on the chocolate glaze. Truly an easy dessert!


For the pastry cream, I use a simple approach. I mix all the dry ingredients in a saucepan (sugar, cornstarch, and salt), then add the eggs, beating thoroughly. Slowly, I stir in the cold milk until everything is mixed together. Then, I place it on medium heat, stirring constantly, until the mixture is nice and thick. At this point, I add the butter, which has been cut into pieces, stirring until it is all incorporated. For the chocolate version, I stir in bittersweet chocolate that I have chopped into small pieces, so that it melts instantly. After transferring the pastry cream to a bowl, I place plastic wrap directly on top of it and refrigerate it. I use this method for pastry cream, puddings, crème anglaise, etc. One pan, easy to do, never fails. It can also be strained to make it velvety smooth.


Enjoy looking at all the delicious variations over at the Tuesdays with Dorie blog site.

Saturday, June 14, 2008

Crackly goodness


A short while ago I heard the most beautiful noise. The loud crackle of bread, fresh out of the oven. This is a big deal for me, because I don’t ever recall hearing it before, even with all the zillion loaves of bread I’ve made over a lifetime. It was really loud. That’s why I noticed.


This morning I decided to bake some regular sourdough bread using the barm I had created several weeks ago for the Poilâne Miche. That barm is tough stuff! When I had to take a brief baking hiatus recently, I shoved the container into the refrigerator and basically ignored it. Thursday night I took it out of the refrigerator so it could warm to room temperature and I could monitor its health. Yesterday, I added a small amount of flour and water to wake it up. It was happy.


I wanted to make the regular sourdough from the Bread Baker’s Apprentice; however, I played with the recipe a bit, substituting the barm directly for the firm starter, and spiking it with some instant yeast, mainly to reduce the time allowed for proofing. I’m impatient today.


Oh, the dough was lovely. It rose beautifully. The bâtard was near perfect. And the oven spring was right on the mark. At the end of 25 minutes, I removed the loaf from the oven and took its temperature. 205° on the dot. I placed it on the cooling rack and proceeded to shut down the oven.


That’s when I heard a very loud, crackling kind of noise. Where was it coming from? I stared at the loaf of bread, which stared back at me, and as I leaned closer, I was nearly deafened by the noise. My bread was crackling! I know, get a life you say, but that sound just made my day. I can hardly wait to slice it and slather butter all over it.


Next weekend I’m catering a friend’s birthday. I think I’ll bake this sourdough again and add it to the menu.


Friday, June 13, 2008

VTV: Freestyle!!

I truly thought I had missed the VTV event this week, and I felt disappointed. A work project consumed my life for awhile, and when I surfaced, I believed the deadline had passed. When I looked at the site, I was amazed to find that the deadline had been extended! That was a good thing.


For the freestyle event this time, I asked my daughter to name one of her favorite vegetable dishes . Aside from green beans, she said it had to be my swiss chard. When I had made a quick trip to the Farmers Market last Saturday to pick up a pint of strawberries, I also bought a bunch of swiss chard, hoping I could fix it in time for the deadline. Well, I guess I did. This chard is gorgeous – so fresh and colorful.


Now, I really don’t have a recipe for this. I fix it simply. I take one small onion, half it, then slice it, and saute it lightly. When the onion is soft, I started throwing in handfuls of chard that I’ve washed and chopped. More accurately, I’ve done a large chiffonade. As the chard wilts, I sprinkle on some salt, pepper, and a few pinches of nutmeg. Then I toss in a handful of raisins, any color. It’s one of the few dishes I like raisins in. Next I put in some liquid, about ¼ to 1/3 of a cup, just so the veggies don’t stick to the pan. The liquid could be water, broth, wine – whatever I have handy or want to use up. Then, on goes the lid and the mixture simmers for up to 10 minutes, or until it’s the way I want it. How precise is that! Not mushy, not raw, but sort of in between. I go by appearance and by taste. That’s all there is to it. Kale works, too, but we really like the chard.


I’m really looking forward to seeing all the entries for this freestyle event. Check it out soon at the VTV site. Thanks to Nina (Love, Sweet, Love) and Jen (Beantown Baker) for hosting.

Boysenberries again


Recently, I had the great fortune to be the recipient of some fresh boysenberries. This was exciting for two reasons. I wanted to use them in a dessert (see TWD post below) and also in a salad recipe that I had just discovered.


This salad contains ingredients that I love -- fresh berries, arugula, and blue cheese -- and is simple to prepare.


Berry, blue cheese and arugula salad

(adapted from a recipe in the June 2008 issue of Sunset)


3 tablespoons extra virgin olive oil

1 tablespoon fresh lemon juice

1 teaspoon fresh thyme leaves

¼ teaspoon dry mustard

¼ teaspoon each salt and freshly ground black pepper

6 ounces arugula (about 13 cups)

6 ounces blackberries (boysenberries, marionberries, loganberries, etc.)

2 ounces mild blue cheese


In a salad bowl, whisk together olive oil, lemon juice, thyme leaves, mustard, salt, and pepper.

Add arugula and gently toss until leaves are coated with dressing. Add berries and gently toss. Divide amoung 4 salad plates. Crumble a half ounce of blue cheese on each salad.


I am submitting this delicious salad to June’s Weekend Cookbook Challenge (#29), hosted by Mike of Mel’s Diner. When the results are finally posted on the WCC site, I’m sure you’ll find many other delicious salads of the season.


Thursday, June 12, 2008

Pasta, Pesto, and Peas


One of the appeals of Barefoot Bloggers is that we only have to cook the selections twice a month. Normally, I have time in my schedule to participate in weekly events, but this past week was a rare exception. I had a deadline for a massive project causing me to work 10-15 hour days, daily, for the last two weeks. That meant no weekends, no groceries, no life. I missed one event this week, but luckily, I had fixed the Pasta, Pesto, and Peas before my life disappeared.


This is a delicious and easy salad to prepare. I usually have all the ingredients on hand in my pantry anyway, and happily, this time was no exception. I was going to make this again for a Board Meeting potluck a few days ago, but, as I mentioned above, work preempted that. I will, however, put this recipe on the list of potluck-potential dishes so I’m prepared for the next occasion.


The salad was a great complement to some home-baked sourdough whole wheat bread.


Pasta, Pesto, and Peas was chosen by Elizabeth of Ugg Smell Food.


Barefoot Bloggers, created by Tara of Smells Like Home, showcases recipes by Ina Garten, the Barefoot Contessa.

Monday, June 9, 2008

Strawberries, boysenberries, or both?

Berry season is in full-swing here in California. And, with perfect timing, Marie of A Year in Oak Cottage, selected La Palette’s Strawberry Tart for this week’s TWD. The tart is wonderfully delicious – who cares about the filling here, when the crust itself is so divine! Ah, but part of the challenge is to utilize the season’s bounty.


First of all, one of my dear friends asked me to take a huge basket of boysenberries, freshly picked from her garden. So, I thought, Great! I’ll make my tart with boysenberries. And, not only did she give me the freshest berries, but she Forced Upon Me (Forced! I repeat!) homemade boysenberry jam. Was she psychic? Did she know we needed both berries and jam? How could I refuse? So, round one tarts were filled with boysenberries. **


It turned out that there were only enough boysenberries for 2 ½ tarts, but I still had 4 of the tasty darlings sitting on the counter. What to do?


Early Saturday morning (after the crazy dog woke me at 5 am), I raced down to the Farmers Market and bought a pint of fresh strawberries for $2.50. Round two brought forth the strawberry tarts. Still delicious.


But, now, there were still two tart shells left and a smattering of red and black berries. So, it was on to round three: a mélange of strawberries and boysenberries, with the yummy boysenberry jam underneath. Triple delicious.


For all the tarts, I sweetened some sour cream and placed a dollop on top. It was just the right amount of tartness to balance the sweetness of the tart.


Great choice, Marie! Truth be told, I didn’t even miss the chocolate this week.


Be sure and visit the other TWD sites to see some out-of-this-world fruit tarts.


** Oh, and all she wants in return is some homemade bread. ; )

Monday, June 2, 2008

TWD: French Chocolate Brownies


For years I’ve been attached to one particular brownie recipe. It never fails. And, it’s flexible.


So, it was a worthwhile experiment to try out French Chocolate Brownies for this week’s Tuesdays with Dorie baking event. My one departure from the recipe was to omit the raisins. The rum part sounded good, but I just couldn’t imagine putting raisins in my brownies, or any other fruit, for that matter. It’s a sacrilege. The addition of cinnamon was fine, since the amount was so small that it didn’t really overpower the chocolate. Actually, I bit of espresso powder would enhance the overall flavor.


In comparing the two recipes, all the basic ingredients were identical and the final amount was identical, but the preparation methods were different. To be truthful, mine is so much easier and quicker. Also, my official taste tester said the brownies from my long-time recipe are better than those from the new one. It’s not that she didn’t like them, but she felt the texture and flavor wasn’t as good. Personally, I think both brownies are delicious, but I’ll have to say that the amount of effort will be the decision-maker here. My recipe is made and baked in less than half the time with equal results.


But I’m glad to have had the chance to audition a new recipe, so thanks to Di of Di’s Kitchen Notebook for this week’s baking selection. For a plethora of brownies, check out the other TWD blogs.


(Oh, and I really love that nice thin crusty part on top.)


French Chocolate Brownies

- makes 16 brownies -
Adapted from Baking From My Home to Yours.

Ingredients

1/2 cup all-purpose flour
1/8 teaspoon salt
1/8 teaspoon cinnamon (optional)
1/3 cup raisins, dark or golden
1 1/2 tablespoons water
1 1/2 tablespoons dark rum
6 ounces bittersweet chocolate, finely chopped
1 1/2 sticks (12 tablespoons; 6 ounces) unsalted butter, at room temperature and cut into 12 pieces
3 large eggs, at room temperature
1 cup sugar

Getting ready: Center a rack in the oven and preheat the oven to 300°F. Line an 8-inch square baking pan with foil, butter the foil, place the pan on a baking sheet, and set aside. (Once again, I used my invaluable kitchen friend, Non-Stick Foil. No need to butter it; just place it right into the pan. Works like a dream!)

Whisk together the flour, salt and cinnamon, if you're using it.

Put the raisins in a small saucepan with the water, bring to a boil over medium heat and cook until the water almost evaporates. Add the rum, let it warm for about 30 seconds, turn off the heat, stand back and ignite the rum. Allow the flames to die down, and set the raisins aside until needed.

Put the chocolate in a heatproof bowl and set the bowl over a saucepan of simmering water. Slowly and gently melt the chocolate, stirring occasionally. Remove the bowl from the saucepan and add the butter, stirring so that it melts. It's important that the chocolate and butter not get very hot. However, if the butter is not melting, you can put the bowl back over the still-hot water for a minute. If you've got a couple of little bits of unmelted butter, leave them—it's better to have a few bits than to overheat the whole. Set the chocolate aside for the moment.

Working with a stand mixer with the whisk attachment, or with a hand mixer in a large bowl, beat the eggs and sugar until they are thick and pale, about 2 minutes. Lower the mixer speed and pour in the chocolate-butter, mixing only until it is incorporated—you'll have a thick, creamy batter. Add the dry ingredients and mix at low speed for about 30 seconds—the dry ingredients won't be completely incorporated and that's fine. Finish folding in the dry ingredients by hand with a rubber spatula, then fold in the raisins along with any liquid remaining in the pan.

Scrape the batter into the pan and bake 50 to 60 minutes, or until the top is dry and crackled and a knife inserted into the center of the cake comes out clean. Transfer the pan to a rack and allow the brownies to cool to warm or room temperature.

Carefully lift the brownies out of the pan, using the foil edges as handles, and transfer to a cutting board. With a long-bladed knife, cut the brownies into 16 squares, each roughly 2 inches on a side, taking care not to cut through the foil.

Serving: The brownies are good just warm or at room temperature; they're even fine cold. I like these with a little something on top or alongside—good go-alongs are whipped crème fraiche or whipped cream, ice cream or chocolate sauce or even all three!

Storing: Wrapped well, these can be kept at room temperature for up to 3 days or frozen for up to 2 months.