Monday, December 31, 2007

Successful , and Tasty

At the same time the pathetic cupcakes were in process, I was also creating the filled bread to enter in BreadBakingDay #5, hosted this month by Chelsea of Rolling in Dough.

Bread is something I can handle (ha ha) apparently. I chose a cheese-filled sweet bread from King Arthur, since I had all the ingredients on hand, and used the Fiori de Sicilia as flavoring. (I'm enjoying a piece even as I write this.) This time everything behaved as expected, and the resulting bread was beautiful and delicious.

The only near mishap occurred when I was removing the bread from the oven and somehow missed the counter. The bare hand (of course) caught the very hot baking sheet, while the gloved hand managed to smash one of the loaves in the effort to save them, but at least the bread didn't land on the floor. Priorities!


The recipe for the Cheese-Filled Sweet Bread may be found on the King Arthur website.

Happy bread baking for 2008.

Pathetic, but Tasty

Occasionally, I will make cupcakes. When I read that the December theme for Cupcake Hero was mint, I was ready to go. The most difficult part was deciding what to do -- chocolate & mint? type of mint? I thought, it will come to me eventually.


First, I searched for mint chips. Now, I knew exactly what I wanted to use -- the green chips from King Arthur, but with the holidays and all, I knew I would never receive them in time. The local grocery stores had the usual boring selection, meaning no mint chips, so I settled on Andes mints, which I chopped up.


Next I thought about the cake part. I love chocolate, but I figured there would be lots of chocolate entries. I happened to make a trifle recently and had some leftover egg whites, so I chose a basic white cake for my cupcakes. Easy, right? Just fold in the chopped mints and bake.


Finally, to be really efficient, I decided against using paper cupcake holders, and chose to bake my cakes directly in a silicon muffin/cupcake pan. How clever! No greasing; no paper; easy! Hah, never again!


The cupcakes failed to rise (yes, the baking powder was new), so they look more like cupcake tops. (I should have been wary, though, because my muffins rarely rise in this pan.) So, now to remove the inch-high cupcakes from the non-stick pan. Clearly, this wasn't going to happen either. The first one came out in pieces. 11 to go. I waited a bit, until they were slightly cooler. Number two lost half its bottom. Goody. A 1/2-inch high cupcake. Better be patient and wait until they are completely cool. I tried. In the end, I had about 6 vertically challenged cupcakes that were usable.


And, in the midst of removing them, I decided against making the 7-minute icing, and opted instead for a simple buttercream, in a small amount, adding green color and peppermint flavor to complement the mint chips.


On the positive side, they actually taste delicious, but I think it will be a while before I bake cupcakes again. Better if I stick to bread and pies.

Thanks to Laurie of Quirky Cupcake and Natalie of Bake and Destroy for hosting the December event.

Saturday, December 22, 2007

Challenge = Birthday Cake

I've always felt very fortunate to have my birthday around the Christmas holiday. What other time of year features such a special cake? I grew up in Bellevue, Washington, and to celebrate my birthday, my mother would go to a small Swiss bakery in Seattle and buy a Buche de Noel. After I left home, finding this special cake was difficult at best, so I learned how to make it myself. Oh, occasionally, I will splurge and buy one if there is a good bakery in town, but it isn't quite the same.

So, this year I was preparing, once again, to make my annual Buche, and was just beginning to gather the various recipes required, when, surprise! the December Daring Baker challenge was announced as none other than the Buche de Noel. No more searching for recipes! Two events for the price of one! Yahoo!

I began with the meringue mushrooms -- I just love those little critters.


They all cheered me on as I moved on to stage 2, the cake.


Once again, the cake was straightforward, although I have yet to make one that doesn't crack a little when rolled, even though I tweak my techniques each time. Guess it's the nature of the beast, and nothing that a gob of frosting won't conceal.


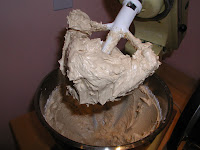
Finally, stage 3, the buttercream. This was fun. I heated the egg white mixture to 120 degrees, then let the mixer do its job until the meringue had cooled. The room-temperature butter was added piece by little piece until incorporated. Then it was time for the flavoring, coffee being one of my favorites. The final result was fluffy and tasty.


One more addition to go. When I lived in New Mexico, I could just go into the backyard and cut some fresh holly, but since this is sunny southern California, I needed an alternate plan. So, I took some almond paste, added a bit of sugar and some corn syrup, then kneaded the mixture to form a dough-like mass. I then kneaded in red for the berries and green for the holly leaves, and formed the various shapes.


At last, it was assembly time. I used about a third of the buttercream for the filling, then carefully rolled the log. I did refrigerate it for a short time to set the roll. Next, I trimmed the ends of the log, and reused one as a side branch. Taking the remainder of the buttercream, I covered the log and the branch, then made bark-like designs in the frosting while it was still soft. I placed the mushrooms and holly as decoratively as I could, then sprinkled it all with edible snow-like glitter.


Many, many thanks to Lis and Ivonne for such a beautiful and delicious challenge. Complete recipes details can be found on Ivonne's blog, Cream Puffs in Venice. Please visit the blogroll to see and enjoy the efforts of all the other Daring Bakers.

Wednesday, December 19, 2007

Yum, Pudding...

Can you tell that school is finished for the semester? What little spare time I have during this holiday season is being spent participating in these fun blogging events. Each month, I've wished to join in, but with studying and work, the time would fly by, and I'd being reading about the next month's challenge. This month, once my finals were out of the way, I checked out all the December events, made my list, and have been busy cooking and baking.

SHF #38 - The proof is in the Pudding!

This month, Sugar High Fridays is being hosted by Zorra of 1x umrΓΌhren bitte. Now, I love puddings of all kinds, so I was very excited to read that the December challenge was none other than pudding, in all its myriad varieties. But which to choose? Since I'm on a panna cotta kick lately, I decided to try out another flavor combination. This time it is Gingerbread Spice Panna Cotta with Lemon Curd Sauce from Panna Cotta by Camilla V. Saulsbury. (The lemon curd recipe was adapted from Martha Stewart Living -- for some reason I had an excess of egg yolks this month!)


Gingerbread Spice Panna Cotta

1/4 cup orange juice (preferably fresh squeezed)
2 teaspoons unflavored gelatin
2 cups heavy whipping cream
1/3 cup dark molasses (not blackstrap)
1/4 cup packed dark brown sugar
1 teaspoon ground ginger
1/2 teaspoon ground cinnamon
1/8 teaspoon ground cloves
1/8 teaspoon freshly grated nutmeg
1/8 teaspoon ground cardamom
1 1/4 cups sour cream
1 teaspoon vanilla extract

Lemon Curd Sauce (see below)

Place orange juice in a small bowl. Sprinkle gelatin over juice. Let stand 5 minutes to soften gelatin.

In a medium saucepan combine the cream, molasses and brown sugar. Heat over medium heat until hot but not boiling. Add gelatin mixture and stir until gelatin is dissolved. Remove from heat. Whisk in the ginger, cinnamon, cloves, nutmeg, cardamom, sour cream, and vanilla until blended and smooth.

Ladle or pour mixture into 8 3/4-cup custard cups, ramekins, or small molds. Loosely cover with plastic wrap and chill 4 hours or up to overnight.

To serve, immerse bottom half of each ramekin or custard cup in hot water about 15 seconds. Run a clean small knife around edge to loosen. Invert each onto a plate. Spoon lemon curd sauce around each panna cotta and serve.

Makes 8 servings.

Lemon Curd

3 large egg yolks
Zest of 1/2 lemon
1/4 cup freshly squeezed lemon juice (about 2 lemons)
6 tablespoons sugar
4 tablespoons unsalted butter, cold and cut into pieces

Combine yolks, lemon zest, lemon juice, and sugar in a small saucepan. Whisk to combine. Set over medium heat, and stir constantly with a wooden spoon, making sure to stir sides and bottom of pan. Cook until mixture is thick enough to coat back of wooden spoon, about 5 to 7 minutes.

Remove saucepan from heat. Add the butter, one piece at a time, stirring with the wooden spoon until the consistency is smooth.

Transfer mixture to a medium bowl. Lay a sheet of plastic wrap directly on the surface of the curd to prevent a skin from forming; wrap tightly. Let cool; refrigerate until firm and chilled, at least 1 hour. Store, refrigerated in an airtight container, up to 2 days.

For sauce, thin the curd with additional lemon juice, whisking until blended and smooth. Spoon around each panna cotta.

Sunday, December 16, 2007

Christmas Cookies

This is my favorite time of the year because I get to bake some of my family's favorite cookies. Because most of them are seasonal, this is truly a special treat. The standard ones are Christmas trees, candy canes, mocha balls, Mexican wedding cakes, and chocolate mint layer cookies. Each year I try to audition a new recipe in the hopes of adding it to the traditional list. This year, Susan, at Food Blogga, put out a call for Christmas Cookies, so I easily have many potential candidates from which to choose.


My contribution is a cookie that is also one of my holiday standards: Soft Springerle. When I was a child, I loved anise/licorice flavor and I was intrigued by one of my Mother's rolling pins that had little pictures carved into it. I don't recall that my Mother actually made springerle cookies, so, when I left home, I asked for the rolling pin, fearing that it would be thrown away and knowing that I would use it myself someday. Over the years I searched for the perfect springerle recipe. Traditionally, these cookies require a period of mellowing, which transforms them from a very hard cookie to one that is more soft, usually a week or two. But who can wait that long! Now, there are times when I will buy a cookbook for only one recipe, and when I discovered a 'soft' springerle cookie recipe in Christmas Cookies & Candies by Barbara Myers (1979), I snatched it up. Maybe someday I'll try some of the other recipes, but, for now, this is the winner.


Soft Springerle
1/4 pound butter
1 pound confectioners' sugar (about 3 3/4 cups, unsifted)

4 eggs

2 teaspoons anise extract or 2 Tablespoons anise seed

Grated rind of 1/2 lemon

4 1/2 cups sifted all-purpose flour

2 teaspoons baking powder

Pinch of salt
  1. Cream the butter. Gradually beat in the sugar. (Mixture will be dry.) Add the eggs, one at a time, beating well after each addition. Beat in the anise extract (or seeds) and lemon rind.
  2. Sift the flour with the baking powder and salt; blend in to butter/sugar/egg mixture. Knead the dough briefly, add more flour if necessary to keep it from sticking to your hands. Chill until firm enough for rolling. (Note: you may not need either the extra flour or the chilling if the humidity is low.)
  3. On a lightly floured board, roll out small portions at a time to about 1/4-inch thickness.
  4. Flour a Springerle board or rolling pin and press or roll firmly into the dough. Cut the cookies between the designs with a floured knife. (A pizza cutter works nicely, too.)
  5. Set an inch apart on lightly greased baking sheets. Let stand at room temperature overnight to dry the tops and set the designs.
  6. Bake at 325 degrees for 10 to 12 minutes, or until pale yellow. Watch carefully so the bottoms don't get too brown.
Makes 3 to 6 dozen, depending on the size of the design.

Monday, December 10, 2007

Favorite pecan pie

Since 1999, my most favorite pecan pie recipe is one I've adapted from Martha Stewart -- Maple Bourbon Pecan Pie. It's one of those eye-rolling pies that disappears quickly.


Maple Bourbon Pecan Pie
(adapted from Martha Stewart Living, November 1999)

  • Pie crust for 9” pie
  • 1 cup sugar
  • 4 tablespoons unsalted butter, melted
  • 4 large whole eggs
  • 1 cup plus 2 tablespoons dark corn syrup
  • 1/2 cup pure maple syrup
  • 2 tablespoons bourbon, or dark rum
  • 1 teaspoon pure vanilla extract
  • 1 1/2 cups (5 1/4 ounces) pecan pieces
  • 1 large egg yolk
  • 2 tablespoons heavy cream
On a lightly floured surface, roll dough to 1/8 inch thick. Transfer to a 9-inch pie tin, leaving a 1/2-inch overhang. Fold overhang under evenly. If you wish, you can make either a decorative edge or a traditional crimped edge. If making a decorative edge, place pastry decorations on a baking sheet. Transfer lined pie tin and decorations to refrigerator. Chill for at least 30 minutes.

Score the outer rim of pie. Beat 1 egg yolk, and brush over hatch marks. Adhere the decorations to the dough. Chill the pie for 30 minutes. Mix 2 tablespoons heavy cream with remaining egg yolk. Brush the egg glaze over the decorative edge.

Heat oven to 400 degrees. In a medium bowl, whisk together sugar, butter, 4 whole eggs, corn syrup, maple syrup, bourbon, and vanilla. Fold in the pecan pieces. Pour filling into pie shell and transfer pie to the oven.

Bake 15 minutes (at 400 degrees), then reduce heat to 350 degrees. Bake until a knife tip comes out clean, about 1 hour 15 minutes. Serve warm or at room temperature.

Wednesday, December 5, 2007

A Housewarming Party and Chocolate-Mint Layer Cookies

Since I grew up in the Seattle area, I look for any excuse to return to the gorgeous Pacific Northwest. One of the delightful Daring Bakers, Peabody, is kindly hosting a housewarming party in honor of her beautiful new home. So, what better reasons could there be -- new friends, new homes, and the Pacific Northwest -- to participate in this potluck?


One of my most requested cookies, from family and friends, is a chocolate-mint layer cookie. It's easy to prepare, delicious, and very, very rich. It's just the right dish to share with new friends during this festive occasion.


Chocolate-Mint Layer Cookies

Dough layer: Grease a 9x9x2" pan. Melt 2 squares unsweetened chocolate and 1/2 cup butter in a medium saucepan. Cool slightly. Beat in 1 cup granulated sugar and then 2 eggs. Add 1/2 cup sifted flour and 1/2 cup sliced, unblanched almonds, and stir until smooth. Pour batter into prepared pan. Bake at 350 degrees for 25 minutes. Cool on wire rack.

Mint cream filling: Beat until smooth 1 1/2 cups sifted powdered sugar, 3 Tablespoons soft sweet butter, 2 Tablespoons heavy cream, and 3/4 teaspoon peppermint extract. Add a drop or two of green coloring, if desired. Spread filling evenly over the cookie layer, cover, and chill until firm, about one hour.

Chocolate glaze: Melt 1 ounce of semisweet chocolate and 1 Tablespoon butter. Stir in 1/2 teaspoon vanilla. Drizzle the glaze over the mint topping. Cover and chill again until firm. Cut into bite-sized squares.

Happy New Home, Peabody!

Monday, December 3, 2007

Studying for my final exam

My final exam in artisan breads is Wednesday afternoon. We were allowed to choose a recipe, so I've narrowed my choice to either panettone or stollen. Of course, I need to study and prepare, right? Good thing I did.

Yesterday, I tackled the stollen, using raisins (light and dark), dried cranberries, and dried apricots, which I soaked in dark rum. For the inside, I used cinnamon & sugar, although the marzipan version sounded delicious, as well. Next time. I divided the dough into 2 portions, and even at that, they were huge! But, oh, so good!


The stollen is even better today. I've been nibbling (too much), so I asked my neighbor if she would do me a favor and take half of the remaining one. I sure hate to twist arms -- ha ha! She was at 'the wall' in a flash.


Today, it was the panettone's turn. Seemed straight-forward enough until it came time to shape the dough. I used a recipe from Cooking Light for Mini Cranberry Panettones, and at the last moment I decided to half the recipe. It was just for practice, after all. So, now I'm shaping and using my really large muffin pan (Texas size) and since it's half a recipe, I only need to make three. Hmmmm That's a lot of dough in each hole, I think, but onward I go. (I usually follow a recipe verbatim the first time, making notes along the way.) These guys were supposed to have a final rise of one hour, but after 30 minutes, they were clearly going to take over my proofing oven, so I popped them in the second oven without delay. Geez.


Well, they may be mutant panettones, but they do taste delicious. Clearly, this recipe will have to be reconfigured.


In the end, the winner is the stollen. I'll put the fruit on to soak Wednesday morning, so it will be ready by mid-afternoon when I get to class. Also, I'll make 3 stollen instead of 2. (I did warn my neighbor to expect another one.)


Along with the stollen/panettone baking, I did squeeze in a few other goodies: cookies and a pecan pie for my quilt meeting tomorrow, and dog cookies for the loyal companion.


I ran across the recipe while perusing Jen Yu's blog, Use Real Butter. The cookies are pretty good (must taste test them, after all -- it's the proper thing to do). After an initial hesitation, the dog has decided these treats are better than anything else, so we're having frequent discussions about daily quotas.


UPDATE: The final exam was successfully accomplished with only a minor glitch. For some reason, the bread wouldn't rise. Most of the other students had the same problem, so either the yeast wasn't viable or the proofers weren't working correctly. However, I proceeded to make the stollen anyway, and it tasted alright at the end. I was glad that I had made a practice run on Sunday. One of my fellow bakers made some delicious rosemary raisin rolls, and we traded breads before going home. I had the last one with dinner tonight -- thanks, Meredith! Now, we just have to get through all the written finals and look forward to next year.