skip to main |
skip to sidebar
 These bite-sized cookies are very similar to traditional Mexican Wedding Cakes/Russian Tea Cakes, which are frequently-baked cookies in this household. The major difference seems to be less butter (my recipes use two sticks) and a pinch of cinnamon -- barely detectable except by the Taste-Tester Daughter.
Usually I use finely chopped, toasted pecans. This time, I chose finely chopped almonds for a change, adding some almond extract along with vanilla.

They were good. They disappeared in a flash. But, we both agreed that we like my regular recipes better. My daughter was definitely not a fan of the pinch of cinnamon.
This week's hostess is Tia of Buttercream Barbie. Visit her blog for the recipe.
Please do stop by Tuesdays with Dorie to read about the other bakers' opinions. (Assuming you are reading this on Tuesday, posting day, I will inform you that I am once again without electricity for the whole day. At least the electric company was kind enough to inform everyone ahead of time. However, I won't be able to read other posts until evening. And, to soothe my distressed feathers, since I can neither work nor bake, I'm heading to IKEA for the day.)
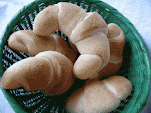
A tale of the good, the bad, the ugly, and the good. This month's Bread Baking Babes and Friends challenge was hosted by Lien, who chose Maori Bread, or Rewena Paraoa. What's really cool about this bread is that you make your own fermented potato starter.
That was one of the good things about this experience. The fermenting process takes about 48 hours after you boil and smash the potatoes. I put this mixture on top of the water heater, checking it once or twice a day. It was exciting to watch the bubbles form.


On baking day, I mixed the potato starter with more flour, some yeast, honey, salt, and finely chopped rosemary. I didn't want to add too much flour to the dough, but in retrospect, I should have added more than I did. The final dough was very slack, a lot like ciabatta dough. Even allowing an extra rise didn't help.

When I put the dough on the baking sheet, it spread into a big puddle. Pulling off the plastic wrap partially deflated it even though both surfaces were liberally oiled. There was no way a stencil would work.
This was the bad part of the experience.
Now, on to the ugly part.
The bread.
I finally gave up and decided to bake it as is. But, I was distressed enough that I didn't recheck the baking instructions, so the poor bread baked for a full half hour at 425 degrees.

One side was a bit darker than the other.
Whoops.
On to another good part: the texture.
This bread had great texture and flavor in spite of the rising/baking issues. The holes and cavities were terrific.

I'm considering making this bread again sometime, adding more flour to make a firmer dough. This will probably reduce the number of holes, but it's worth a second try.

 The March 2011 Daring Baker’s Challenge was hosted by Ria of Ria’s Collection and Jamie of Life’s a Feast. Ria and Jamie challenged The Daring Bakers to bake a yeasted Meringue Coffee Cake. This was a tasty homemade bread challenge. It's always good to add another recipe to the collection. I did get so caught up in the preparation that I only remembered to take photos at the beginning and the end. The middle stage will remain a mystery.
After preparing the dough and letting it rise, the next step is rolling it out. (Although the recipe says the dough will only take about 45 minutes for the initial rise, mine took nearly two hours.)

Then the filling is added -- a fluffy meringue,

followed by cinnamon sugar,

followed by (imagine this) sliced almonds and mini cinnamon chips.
Next, you roll up the dough, form it into a circle, then make slashes around the edges so the filling shows through.
Once risen a second time, the bread is brushed with an egg wash before being baked. I added some sugar sprinkles for that sparkly effect.

It was a delicious bread, good for breakfast or for a snack. it didn't last long at all.

For the recipe, head over to the Daring Kitchen. There, you can also see all the flavor variations made by the other bakers.
 These brownies were a surprise hit. Honey is not the typical ingredient for brownies, especially one whole cup's worth, but the end result was mighty tasty.I used mesquite honey, which gave an interesting background note to the chocolate. The chocolate flavor was on the mild side.
 Instead of using extra pans, I melted the chocolate and butter in my 2-cup pyrex measuring cup, in the microwave, allowing me to pour it right into the sugar/honey/egg mixture.The texture was extremely moist, somewhere between fudgey and cakey. And like many desserts, it improved with time. Day 3 brownies were still moist with a lovely honey-chocolate flavor.
 While the nuts were a nice addition (I used pecans), my daughter thought that replacing them with chocolate chips would augment the mild chocolate flavor. Even so, this dessert disappeared really quickly, a sure sign of approval. There were definitely strong opinions about this brownie recipe from the other TWD bakers. Stop by the Tuesdays with Dorie blog to see what they had to say.This week's hostess was Suzy of Suzy Homemaker.
 Certainly, I would have added currants, if I'd had them. They are a much better addition than raisins, to my mind. There was a box in the pantry, to be sure, but upon opening it, I discovered about one tablespoon of currants. Not enough to consider using.
I debated the pros and cons of various items in the pantry, then noticed a large milk chocolate bar from TJ's that was begging to be used. So, I carved off a largish pile of milk chocolate shavings to add to the muffins.
We thought it was the perfect combination with the orange juice (from Cara Cara and Blood Oranges) and the lime juice (no ripe lemons yet, only limes).
I should report that we liked these best on the second day. The citrus and chocolate flavors had mellowed quite a bit, making a mighty fine-tasting muffin.

This week's hostess was Lauryn of Bella Baker.
More muffins can be found on the Tuesdays with Dorie website.
 These bite-sized cookies are very similar to traditional Mexican Wedding Cakes/Russian Tea Cakes, which are frequently-baked cookies in this household. The major difference seems to be less butter (my recipes use two sticks) and a pinch of cinnamon -- barely detectable except by the Taste-Tester Daughter.